since I posted, so I thought I'd update today!
I have been working on the challenges at
ScrapCity for their sketch fest! All LO's are due by Friday. I created two sketches for the crop, one of which I posted earlier, and this one below. This particular one is designed to get people to use their scraps!

I have 5 LO's done for the crop, so I will scan them and post soon!
A few weeks ago at
2ScrappyChicDesigns we had a "Crop Your Heart Out" weekend crop. I made a little mini album out of tages and envelopes as a tutorial. I thought I'd share:
Tag & Envelope Mini Album
I bought these tag and envelope sets from Hot Off the Press

http://www.paperwishes.com/
but I have seen them at Hobby Lobby and Michaels.
Here are the instructions for making this album:
1. Remove the tags from the envelopes and cover the end with a piece of patterned paper. I cut a piece of PP about 3 inches, and had 1 ½ inches on one side, and it wraps around the back to the other side.
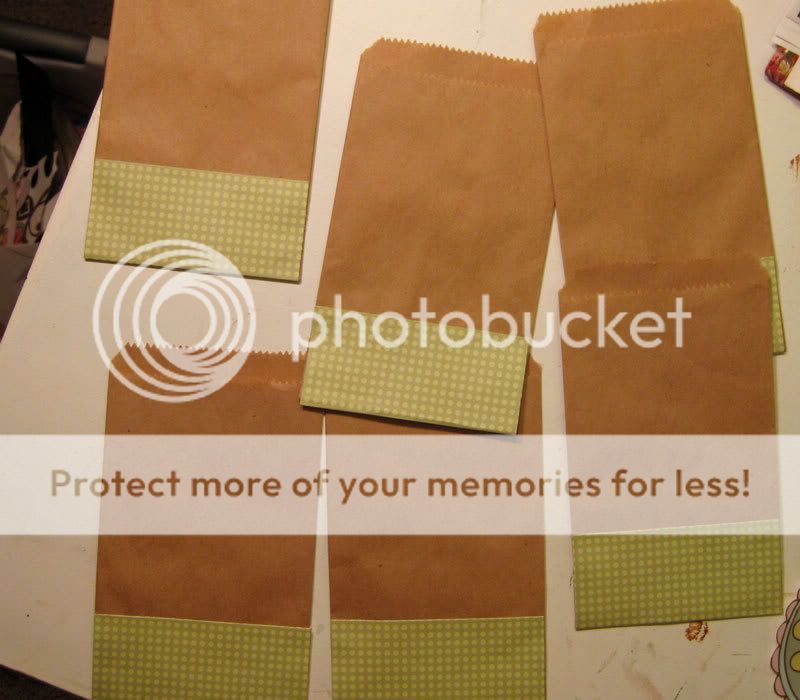
2. Ink the edges of the envelopes.
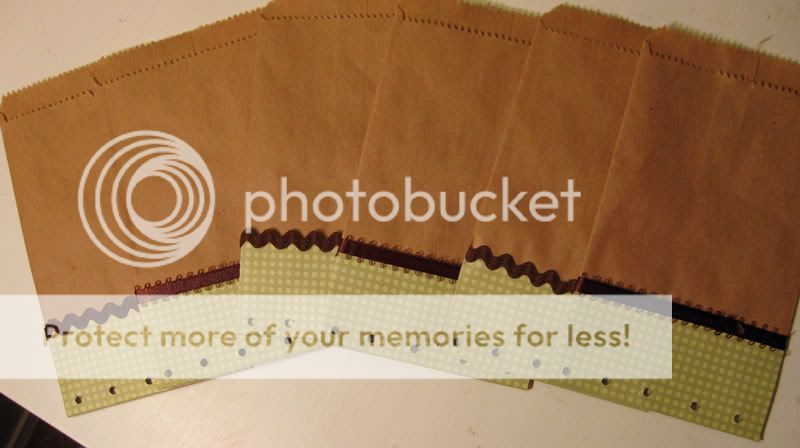
3. Measure and punch out holes along edge for binding. I used my crop-a-dile for this.
4. Glue ribbon at the end of the PP around the envelope.
5. I wanted to just put photos on my tags and have journaling on the envelopes, so I used some small journaling stamps and stamped on the front side of the envelope.
6. I cut out some shapes from some PP that I had and glued them to the front.


7. When the front of each envelope is completed, thread twine, string, or ribbon through the holes and tie in the front.

8. Now it is time to decorate your tags. I used some coordinating papers and I had a little inspiration help from Tag Maps! http://www.pagemaps.com/ I inked each tag at the edges, and added a different ribbon to each one, too.


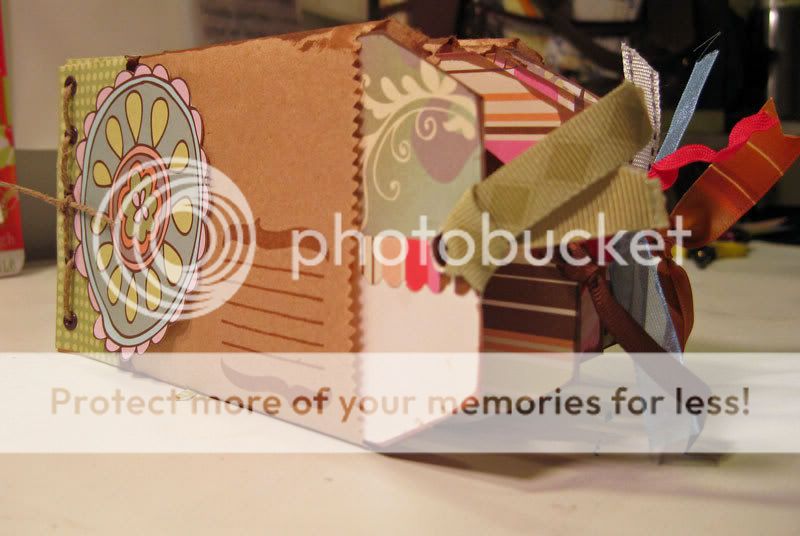
I haven’t added in the photos yet on my tags, but I plan on giving this as a gift to my mom for her B-day in March!
You don’t have to go out and buy bags and tags. You can easily make your own tags from cardstock, and then make bags to match. I would suggest using vellum or old paper bags to make your smaller envelope bags. There are many sites with some great tag and bag and envelope templates:
http://www.stampington.com/html/tempting_template_index.html
http://www.ruthannzaroff.com/mirkwooddesigns/templates.htm


