Wednesday, March 30, 2016

Grow some Yum! Just Nick Studios!

When I saw the Fancy Floral design in the Just Nick store, I thought it would look awesome done with Sketch Pens on the Silhouette!


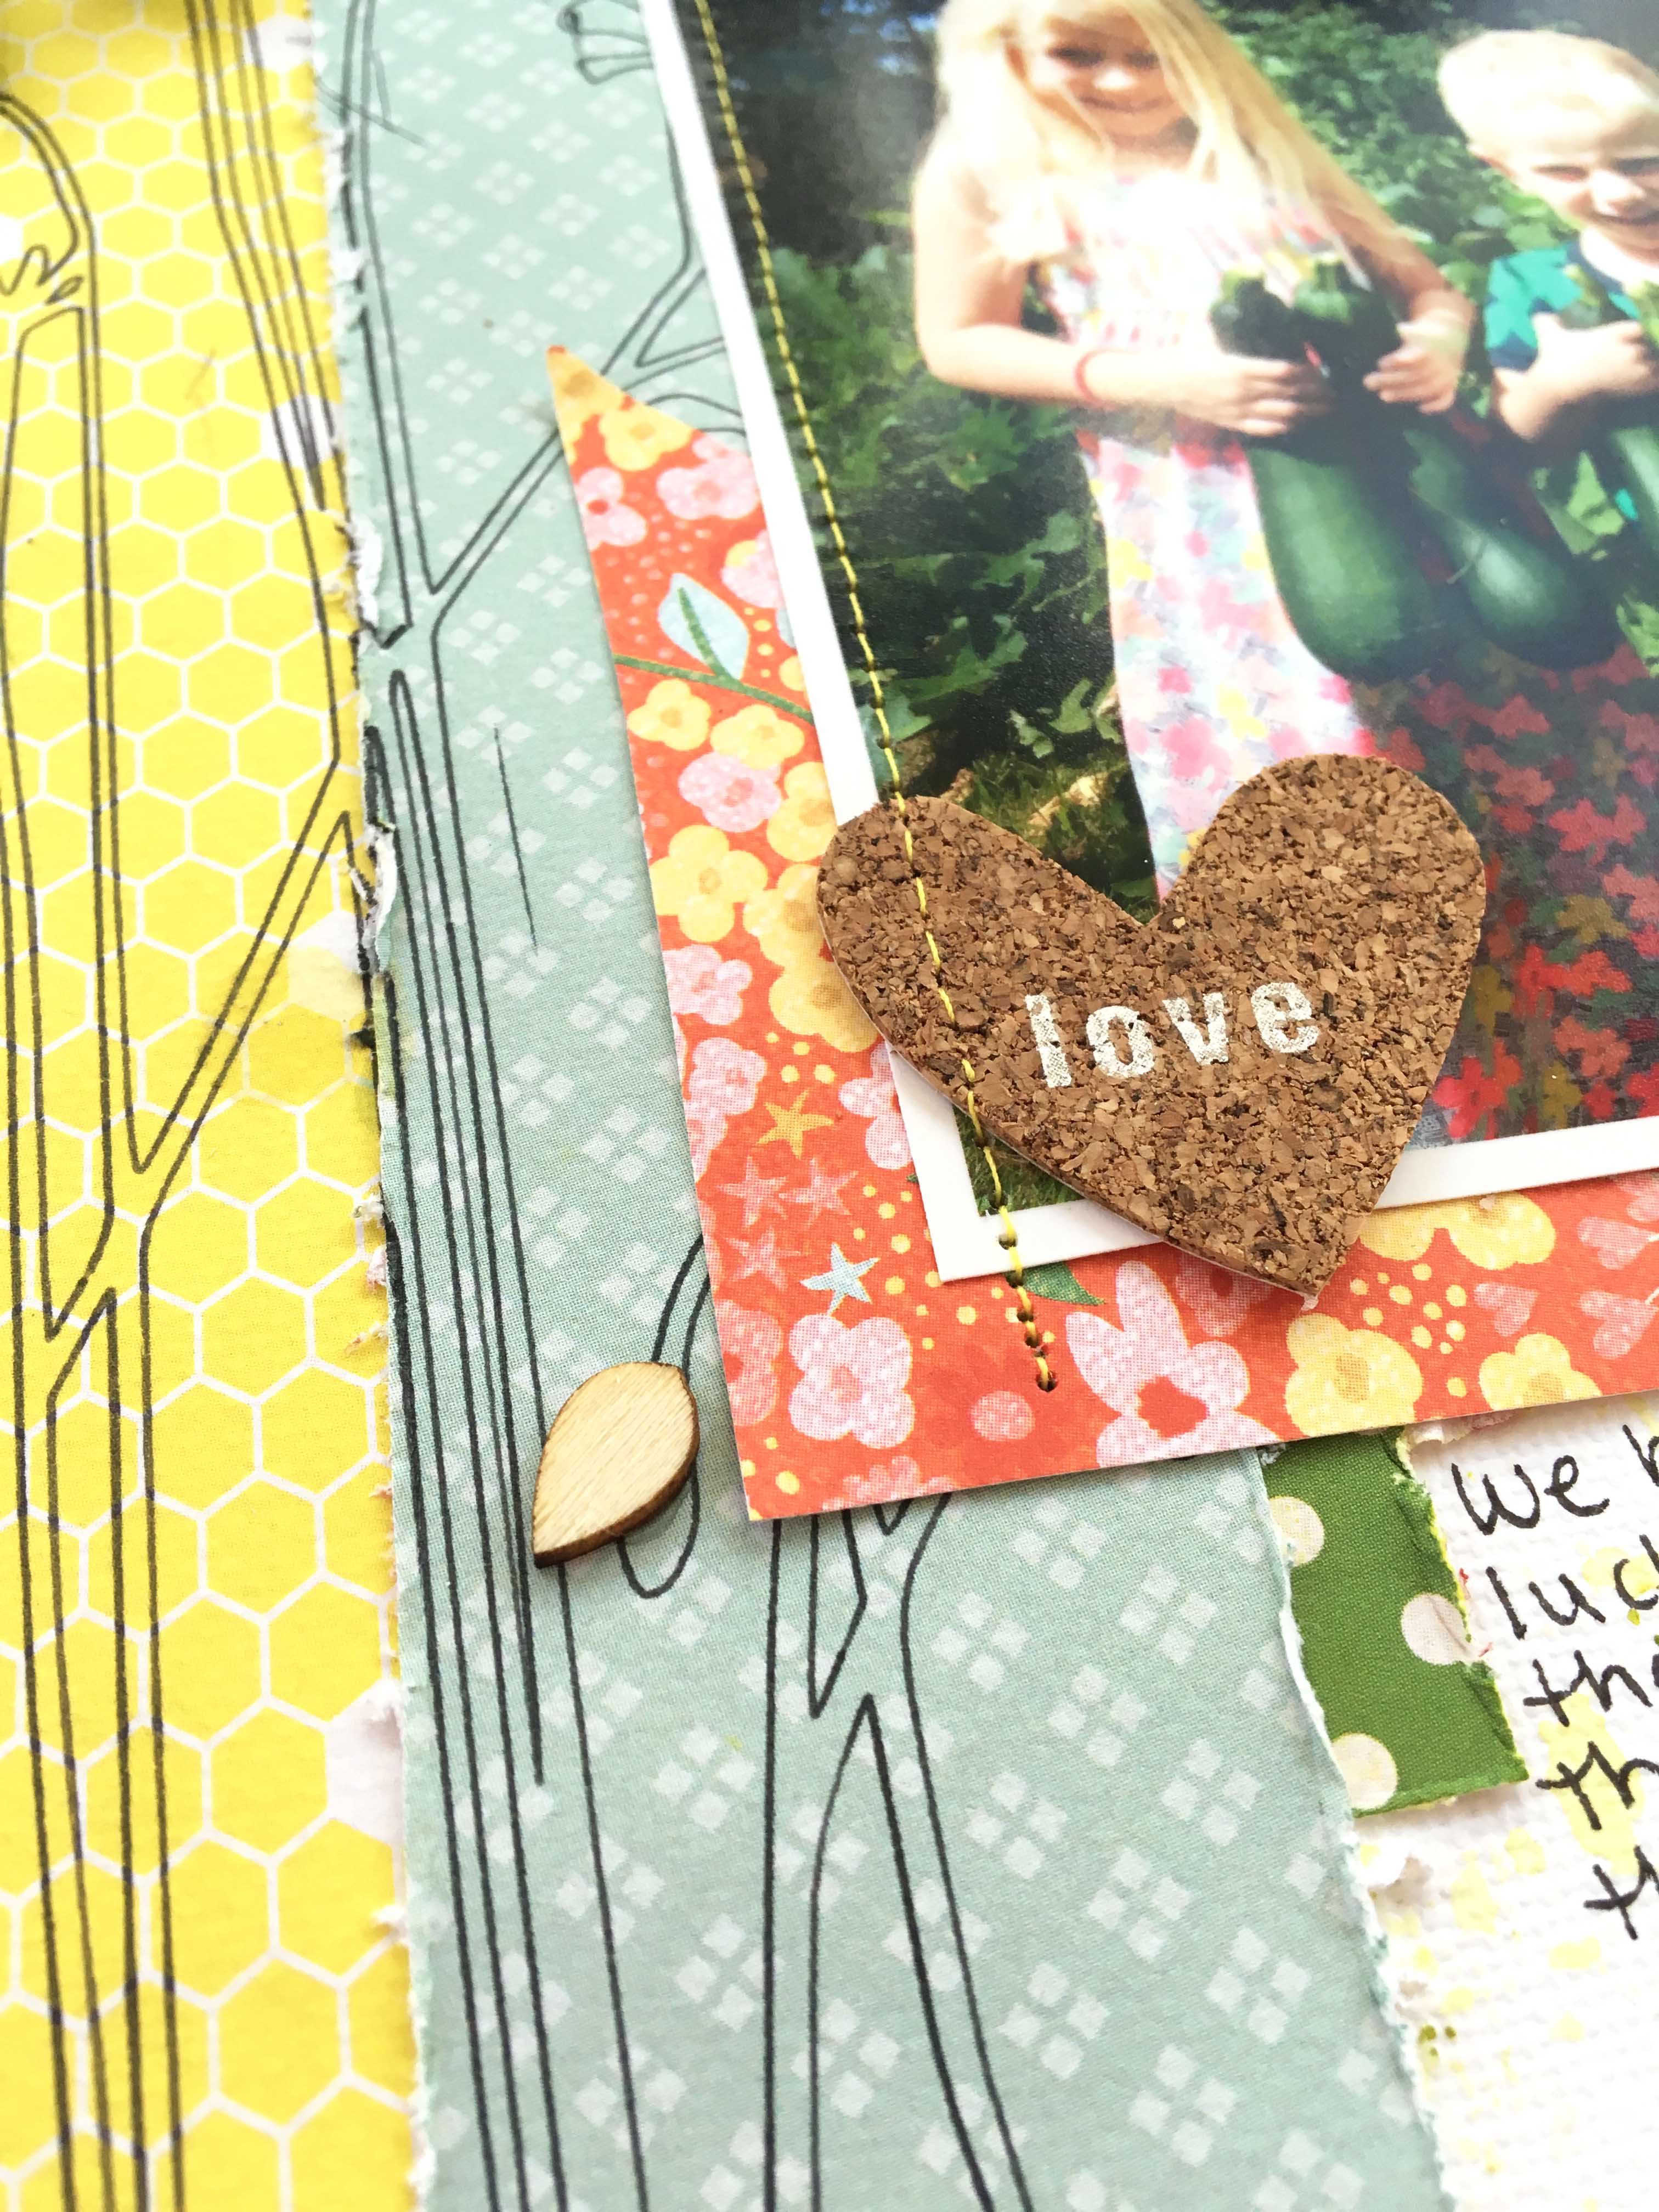
I wanted to experiment a bit to see how the pens would do over layers of paper, and here is the result:


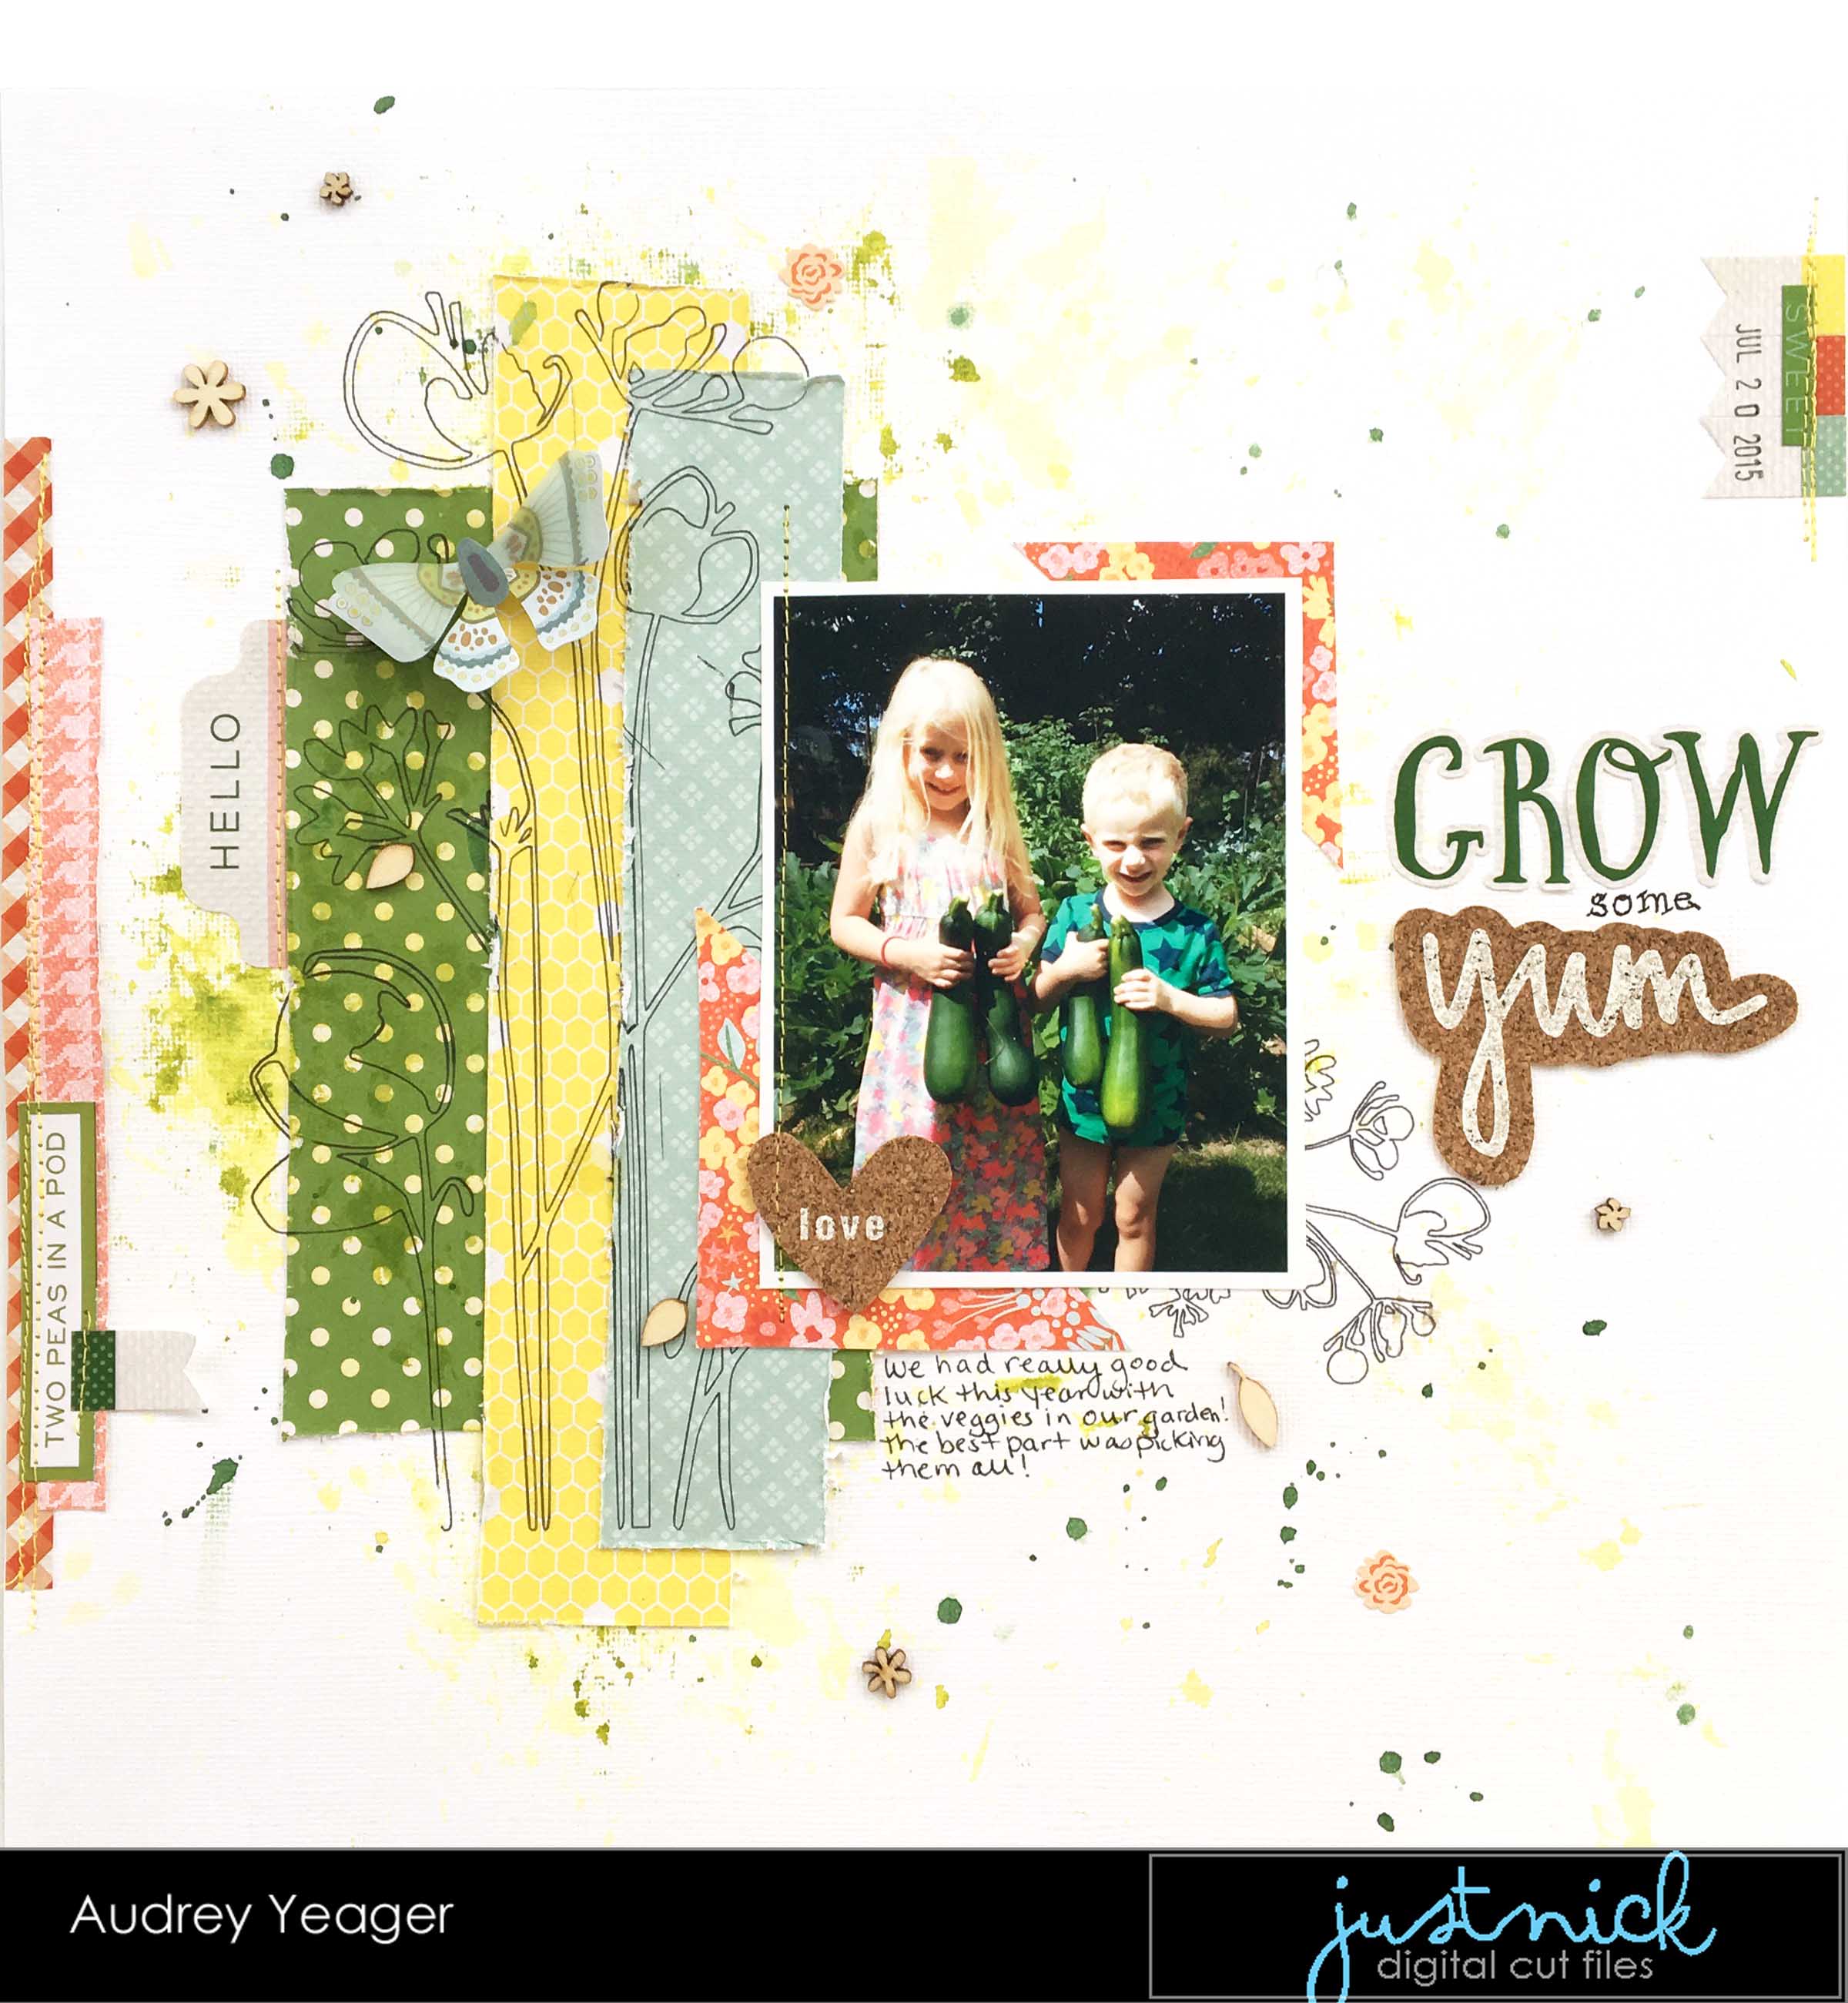
We added new garden beds to out yard last year and we had pretty good success with all the veggies that we grew!  The kids loved picking them when it was time!  These zucchini were HUGE!

I layered some papers on the background and made sure to measure where they were on the page.  In the Silhouette Design Studio, I added my file to the same area on the page and then ran the layout with the papers glued on through my machine with the pens.


I have to say that I am surprised at how well it came out!  One thing I noticed, however, is that on the third layer of paper, there are some spots where the pen dragged a bit because the layer was too thick.  But it is hard to notice with this particular design.


If you don't have sketch pens yet, you should really try them out!


Papers and embellies are from Echo Park "Homegrown" and Basic Grey "Sunkissed".


Stay scrappy my friends!

Tuesday, March 29, 2016

Vintage Fabric Seed Packets

Hello everyone and happy spring!

I have a simple and fun home decor or gift project you can make with the Therm O Web HeatnBond® EZ Print Transfer Sheets! These transfer sheets allow you to print your favorite images and photos onto them and then heat transfer to fabric. Perfect for home decor, tote bags, apparel and much more!

  Fabric Seed Packets


Project Supplies: HeatnBond® EZ Print Transfer Sheets
Fabric Fuse™ Liquid Adhesive Glue
 -Muslin or other material
 -images of vintage seed packets (which I found HERE on The Old Design Shop page)


  IMG_7290


 First you want to print your images onto the 8.5X11 HeatnBond® EZ Print Transfer sheets using your InkJet printer.  MAKE SURE YOU REVERSE YOUR IMAGE so that any text will not be backwards when transferring the design. Cut out each seed packet design and iron to a piece of fabric.  Follow the ironing instructions on the package.

  IMG_7286

Next, cut out a flat "packet"shape from the material, with the seed packet cover on the front.  I just guesstimated on mine, however, there are lots of printable templates you can find online if you want to trace a certain design.


  IMG_7287


Fold and iron the back to the side flap and the bottom flap using Fabric Fuse™ Liquid Adhesive.

  IMG_7288

IMG_7289


Now you can use your packets for home decor, or you could fill them with actually seeds and gift them with a cut little pot, a pair of gloves, and some gardening tools!

  IMG_7294

IMG_7293

IMG_7292

You could also use this idea and print out other images to make special gift envelopes, party invitations, favors, or thank you notes! Have fun transferring images to fabric!

Stay scrappy my friends!

Monday, March 28, 2016

Happy Easter! Therm O Web Super Tapes

Hello and Happy Spring!  

The flowers are starting to come up and the days are starting to get warmer!   How cute are the kiddos below in their Easter outfits from last year?  I loved their hats!  (Too bad Charlotte wasn't smiling).


I made the gold glitter and white flocked flowers with the SuperTape™ Adhesive Sheets from Therm O Web that I cut on my die cutting machine.  The Lazy Daisies cut file is available in the Just Nick store!  The springy papers and die cuts are from Pebbles and Pink Paislee. Isn't that bunny just adorable!


  Easter  


To begin, I added a piece of the square SuperTape™ to a piece of white cardstock, leaving the red film on one side.

  supertape 1  

Next, I ran this cardstock with the tape through my cutting machine to cut the flowers.  On my Silhouette Cameo, I used a blade depth of 7 and the double cut feature.
  super tape cutting

 Once cut, I weeded the design from my mat and pulled off the flower shapes.
  super tape 2  

Gently pull off the red film on a flower and add some loose gold glitter.  I glittered half of my flowers and used a white flocking powder on the others.  Once coated, it's best to rub in the glitter and flocking powder with your finger to make sure the flower is completely covered.

  super tape glitter
  super tape flowers  


 Finally, I layered the flowers together to get the desired look for my page.  A few enamel dots or buttons make great centers, and you can pop them off your page with some 3D Zots™!  And that bee brad was a bonus find in my stash from an old Crate Paper collection called Neighborhood.


  Easter close up 2

easter close up 1

easter close up 3

Easter  

Stay scrappy my friends!  Hope you had a wonderful Easter weekend!

Thursday, March 17, 2016

Prize Wheel Quilt finished!

I'm so excited to share my latest quilt finish with you today.  I am always inspired by Cotton & Steel prints, and the Penny Arcade bundle was one I had to have!  For some reason, the though of a "Penny Arcade" got me thinking of state fairs and games. Spinning prize wheels came to mind, and I thought some sort of dresden pattern would be fun!


I found tons of dresden and wedge inspiration on Pinterest, which lead me to this blog with a beautiful quilt made with a 9 degree ruler.

On that blog, there is a link to the actual pattern which you can find HERE. I decide that this was what I was going to work with.

I ordered the 9 degree ruler from Amazon and got to work.  I followed the pattern for the most part, but instead of making the quilt into a circle, I appliquéd each quarter of the circle onto a 36" square piece of background fabric.   The wedges came together so fast!


The background is RJR Fabrics Cotton Supreme in Burlap.

I was originally going to use the scraps from my wedge piecing as a border on all four sides, but for some reason I have an aversion to perfectly square quilts.  So I added a border to the top and bottom and I am happy with that.

For the quilting, I just marked a line through the center of each wedge and carried it through the center to the opposite wedge.  I love how soft the more loosely quilted areas are, and I also love all the texture in the center!


For the back, I used the City Overnight from the Penny Arcade collection.


The final product reminds me of the wheel on Wheel of Fortune, hence the name "Prize Wheel"!


 I just LOVE the way it turned out and might be one of my favorite quilts yet!

Thanks for stopping by and stay scrappy (either with paper OR fabrics!  :)  )

Thursday, March 10, 2016

March Page Maps and Just Nick cut file

Hello everyone!  Have you see the wonderful sketches this month on the PageMaps site?   It is always one of the first stops I make each month when I am looking for sketches to use!  

The Just Nick DT got to work with the sketches AND use awesome cut files from the shop!

I created this page with one of Becky's sketches (which you can see HERE) and the XO Heart Background file from the store.   I used the new Urban Luxe collection from Basic Grey. 

Charlotte and Daddy got to have a special night out for the Daddy Daughter Dance.  They went out to dinner first and she got to choose anywhere she wanted.  She chose a diner!  They went to Mel's Diner and she had a burger and fries!  Then it was off to the dance for snacks, crafts, a photobooth, and of course dancing!


I followed the sketch pretty closely, using a large swipe of black paint to help balance be design.


I created an interesting embellishment cluster by layering an "X" and an "O" cut out of different papers and a frame to tie it all together.  My journaling is a tag that is tucked under this cluster.


This is a unique and different color combo for me!  I loved layering these colors and bits from the Urban Luxe Ephemera pack!

Check out the XO Heart Background cut file in the shop HERE:


Thanks for stopping by and be sure to check out this month's Page Maps!

Stay scrappy my friends!


Monday, March 7, 2016

Farmer's Wife Quilt progress

Last year, I bought the Farmer's Wife Quilt book and was so excited to start!  I found a group on Yahoo Groups that had TONS of reseources, including paper piecing patterns for each block! Each week a new block is posted for you to complete, and your name goes on the "Achiever's List" if you finish it by the end of the week.  It keeps you accountable and I love it!


I completed 2 blocks with some scraps from a quilt I had made for my mom using Cotton & Steel Mustang collection.

Then I set them aside for about a year and didn't do anything!

I recently got motivated again and sat down with my C&S stash, print outs of some of the paper piecing patterns and paired them up with some fabrics.  I put them in baggies, and have been pulling them out here and there to complete them!


23-Country Farm


48-Homeward Bound


68-Postage Stamp


69-Practical Orchard


70-Prarie Queen


87-Star Gardener


97-Waste Not


108-Windmill


My goal now is to keep up with doing at LEAST the weekly block, and adding in extras here and there when I can!

This is my most recent batch from last week:

8-Bouquet


11-Broken Dishes


29-Economy


 45-Grape Basket


I love the way this is turning out!

You can see more of my blocks and quilts in my Flickr gallery here:

https://www.flickr.com/photos/35187278@N07/