Showing posts with label washi tape. Show all posts

Saturday, March 30, 2013

Step by Step Saturday with Glitz. Washi pattern card...

Hello everyone!  I have a really easy way to create a fun pattern with some washi tape to use on a card, tag, or layout!  I created mine on a standard card base size- 4 1/4" x 5 1/2".  You will need at least 2 patterns of washi.

1. Draw a pencil line down the middle of your base.  You are going to add a piece of tape at a 45 degree angle to your pencil line.  Now, I just eyeballed mine, however, I noticed that my final design was a bit skewed, so it is important that you get a 45 degree angle (time to break out the protractor!).


2.  Now you are going to add your 2nd piece of tape to the other side, going in the opposite direction.  You want the corner of this 2nd piece to be right on your pencil line.  Be sure to cut the end of the washi in a straight line to give it a clean edge.


3. Alternating sides, keep adding strips of washi.  Make sure you stick to the same pattern/order of tapes on each side.


4. After your area has been totally covered, turn your base over and trim off all the excess tape!


5.  Now you can use it as a card base, cut out a tag shape, or even as a piece of patterned paper on a layout!

Here is a simple card I made using my base.  I kept it simple because of the busy pattern that I really wanted to stand out!


Thanks for stopping by and have a wonderful Easter Weekend!

-Audrey Yeager


Friday, September 28, 2012

Playing along with a few challenges....a girl in goggles...

 That Charlotte....she's a hoot.  Out of no where she comes around the corner with these goggles on, all ready to go outside at the cottage and play (as if the goggles were required to play outside).  She is quite the character....


I started by painting some streaks of white paint along a straight line.  Then I added bits of washi tapes along the line, too, and some pennants cut out from a piece of paper from the Soleil collection.


I used a wacky circle stencil from TCW and did some mustard colored circles.  I wanted to matte my photo, but have something subtle, so I used a piece of vellum that I stitched and distressed around the edges.  I also punched some hearts right in my photo.


A few stickers, and some fussy cut papers from BG Paper Cottage, and she's just about done.  I added some stickles here and there, too.


Well, I went on a streak without using sketches for a while.  Not intentionally....it just kinda happened.  But I have done a few here and there in the past few weeks, and I remembered HOW MUCH I can get done if I have some sketches in front of me!  So now I have about 15 printed out to work on!  :)


I LOVE the sketches over at Skissedilla.  The page above is based on this sketch:


While browsing for challenges, I also came across the colors challenge at Freckled Fawn.  The colors were PERFECT for the Soleil collection from Basic Grey that I just got from winning on the BG blog a few weeks ago.  So I ALSO entered this into the BG "arrows" challenge.


I was supposed to go to a crop this Sat., but it got cancelled.  I convinced hubby to let me have a few hours to scrap, anyways, so hopefully I can work on some things that I WANT to!!!  Hope you have a great weekend!!

Sunday, July 15, 2012

Wonderful WASHI- Paper Issues Blog Hop and PRIZE sponsored by Freckled Fawn AND a tutorial!!!!!!!!

IF YOU ARE HERE FOR THE INSPIRATION ELEVATOR HOP, CLICK HERE.


WASSSHHHIIIIIIII!  Love the stuff.  I just got some Freckled Fawn tapes from Paper Issues (along with a whole bunch of other stuff, like the Crate Paper Little Boy Blue line that I used for my page).  This weeks Washi Tape theme is sponsored by Freckled Fawn!


Yup, that's right....you could win a $25 gift card to Freckled Fawn.  Just hop along and leave comments and then post on the Paper Issues Blog.  There are only 5 of us, so it won't take long!

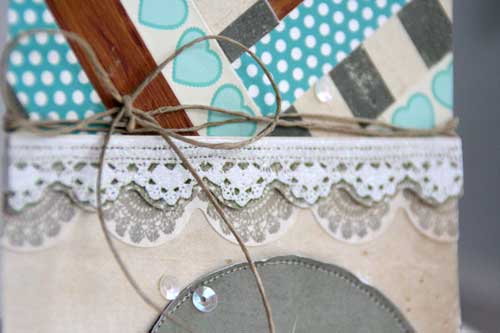
Anyways, when I got my tapes I started playing around and folding them in different ways.  At first i was trying to make some crazy flowers or something, but I ended up making a zig-zag chevron pattern with it instead.  I also used some small strips of the different patterns to use to hold my circles on the page:


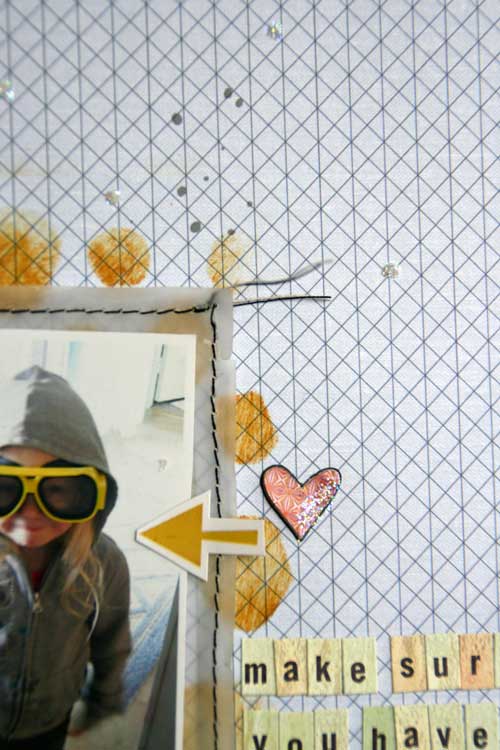
Isn't that little guy just a doll??? All 6 of his teeth just popped out in about one week.

I started my page by inking with grey ink through the "Blazonry" Crafter's Workshop template (my favorite one).  I cut out a whole bunch of circles of different sizes and patterns and arranged them on the page.  I took my washi tapes and used them to hold the circles on.  Some of the circles I punched some holes in just for some interest.


I decided that I wanted to add just a few tiny bits of green on the page to pull out the green in my photo and to create a visual triangle.  


 Finally I added a bit of zig zag machine stitching here and there. I also made a zig zag pattern with some washi tape and stitched over that as well.


So how do you make a zig zag pattern with washi???  Well funny you should ask.  Here is a quick little tutorial showing you how to fold the tape to create this pattern.


1. Pull out a length of tape about 6-7 inches and fold the left loose end down at a right angle (sticky sides of the tape together).


2.  Now fold the right side down at a right angle to create a point.


3. At this point you are going to need to lift your tape off the table.  Take the roll and fold it back and under (again, sticky sides always together) so that the roll is towards the right again.


4. Now fold your tape up at a right angle to create the downward facing point. (Sticky sides together!)

5. Fold your tape under and to the right again, and you have started the next point.

6. Keep repeating this to create a zig zag to your desired length.  Note that because you keep folding the tape sticky sides together, it doesn't actually "stick" once you have finished it, so you are going to have to glue it or stitch it onto your page.

For a really cool look, take a whole bunch of washi tapes, create some zig zag pieces, and layer them to create a chevron pattern!


Now hop along to these other wonderful ladies' blogs to see some more washi projects!!  Thanks for stopping by!


3. Audrey http://audreysreflection.blogspot.com <-----you are here

Tuesday, May 15, 2012

Inspiration Elevator

Welcome to Inspiration Elevator!

Photobucket


IE is a group of like minded scrappy friends who want to raise the bar in their own creative process through unique challenges that we issue to each other once a month. These won't be run of the mill challenges and we hope you will join us each month and be inspired by the innovative designs we create.

This is not a blog hop, and there are no prizes, but we would love it if you would take a few minutes to see what the rest of the Inspiration Elevator team created. We are sure you will feel inspired to get creative:

Ann 
Sue


The first challenge, issued by Christa, is two-fold: to create a new design that reflects your style, and to use a new product or technique that you find inspiring right now.

So to attack this challenge, I had to think about what is quintessentially me and my style?  My pages usually include:
  • patterned paper background
  • bright, fun colors
  • 2-3 photos of my kids and our daily activities
  • machine stitching 
  • misting and/or paint splattering
  • something on the "edge" of the page
  • a strong visual triangle
  • using the latest and greatest products
So here is what I came up with using the new Indie Chic line from MME.


At the scrapbooking store where I work, Scrapp'n Savvy" there is an "adopted" orange kitty that is named "Savvy".  Charlotte calls her "Sabby".  It is her favorite thing about going to the store and every orange cat she sees is "Sabby".


These new lines from MME have some AWESOME washi tape which I used here and journaling lines.  I just cut the tape in half length wise to make thinner line.  You can also see my machine stitching and a few pink paint splatters.  Also, I used some GOLD mist from Studio Calico (which is AWESOME) in the background behind the center cluster.


These little banners also come as part of the line, and you can see that I cut a few extra leaves and popped them off the page to give some dimension,  one of the other things that I like to do on my pages!

Well I hope that you stop by every month and get some inspiration and  ideas from all the wonderfully creative people on the Inspiration Elevator team!