Sunday, April 21, 2013

Papers Issues ftg. Elle's Studio 'Serendipity" *blog hop*

A new theme is up this week at Paper Issues and it is all about "Serendipity" (anyone remember that movie?). Anyways, when I typed in "serendipity" into a google search (because I didn't know how to spell it correctly)  I see that part of the definition says "happy accident".  I LOVE happy accidents when it comes to scrapping, and I wish I could say I had one on this page, but there were no "accidents" this time around...everything was as planned!  Although I did use all Elle's Studio 'Serendipity' products:


I based my page off of a sketch at Skissedilla this week.  I loved the scattered photos on the page, and I had a lot from this little "shoot", so it was perfect! We have a GREAT climbing tree in our new backyard, and Charlotte felt like she was up so high (but she was about 3 feet off the ground) :).


On the background, I painted with a wash of gesso mixed with some light blue paint, then I splattered some yellow and green mists.

Over that, I added some white washi tape and some washi with gold little dots.  Then I took a stamp from Elle's Studio and stamped the "So lucky to have you" sentiment over and over again.


 A few fussy cut flowers and a great scattering of tags and she's done!  Not a lot of paper on this page, but still a lot of little details and colors!

So if you have a project that is "serendipitous", or perhaps one of these other themes, you should link it up to Paper Issues:

Chance
Fate
Destiny
Luck
Fortune
Kismet

OK, now hop on to these other fine ladies blogs and see some more Elle's projects!


Amy T.: http://tsurutadesigns.blogspot.com/
Audrey: http://audreysreflection.blogspot.com/   <---you are here
Diana: http://designbydiana.blogspot.com/
Leslie: http://leslieashe.blogspot.com/
Melissa: http://www.missygener.com/
Pamella: http://happytobecreating.blogspot.com/


Thanks for hopping with us today!

Be sure to do the following:

 1. Like Elle’s Studio on Facebook {tell them we sent you}
2. Like Paper Issues on Facebook
3. Leave a comment

****************************************************************
Oh, and one more thing before I go....another page with the "Lucky You" kit from Paper Issues!  Last time I checked, there was only one kit left!

We have a lot of beautiful gardens at our new house and it is fun waiting to see what is popping up this spring.  I let the kiddos each pick a daffodil and they thought it was the best thing....:)


Sometimes if I am not sure where I am going with a page design, I just start fussy cutting and as I am cutting, I think about it more and more.  That is what I did here:  I just started cutting the flowers and the page took off from there!  I love how awesome the seam binding is for making bows!!


Remember, you can always save 20% off your purchase at the Paper Issues store by using the code AUDREY!

Stay scrappy my friends!

Friday, April 19, 2013

Spring Sweetness- GCD Studios "Nostalgia"

Spring has FINALLY arrived!  It's been a relentless winter here in central NY state!

Nothing helps get you into an springtime mood better than some springy papers and some cute photos!  These are my kiddos on Easter Sunday, which happened to be a decent day.  I challenged myself to use a LOT of patterned paper on this page because there were so many pretty springy prints and a great mix of tone on tone and patterns.  I think I have TEN different patterns on here!  :)


Of course I had to fussy cut out some flowers and I added some Glitter Epoxy dots to the center.  The leaves I cut with my Cricut.


On my alphas, I wanted them to be a tiny bit more blue, so I went over them lightly with a blue ink pad.  The heart I die cut on my machine, too.


I love having lots of layers, and these square brads and the paperclips add just the right finishing touches!


Hope you are enjoying your spring!


Supplies:
Nostalgia Patterned Papers: Romantic Garden (#1985), Evening Field (#1986), Nostalgic Plaid, Red (#1987), Flourish in Blue (#1988), Nostalgic Cutouts (#1992), Nostalgic Plaid, Blue (#1996)

Pure Bliss Brads (#2034)
Pure Bliss Paper Clips (#2035)
Kathy Davis Happiness Glitter Epoxy Dots (#1868)
Family Jeans Chipboard Alphas (#2090)


Wednesday, April 17, 2013

Inspiration Elevator- First Year COMPLETE! *giveaway*

From the IE Group:

Welcome to another Inspiration Elevator reveal! We are thrilled to celebrate the end of our first year of Inspiration Elevator challenges and are anticipating that the second year will see that creative growth continue to go UP! To celebrate our first anniversary and our fabulous designers, Christa and Ann decided to challenge our designers to take an in-depth look at a fellow designer's artistic portfolio via her blog, choose elements from that designers creations,and incorporate them into her own work. In other words, we are encouraging a scrapLIFT! Rather than a mere copy of someone else’s work, this is a stylistic scraplift that should inspire each designer to grow creatively as she is inspired, yet remain true to her own style.

As the second year of this creative journey begins, and as the popularity of Inspiration Elevator increases, we have created a new blog for our Inspiration Elevator Challenges. So, if you want to play along you can find the challenges and links to the inspiration all in one place! To celebrate our first year, our hopping will incorporate RAKs along the way – how exciting! Now, before you go hopping along, we want to let you know of a few personnel changes.

While, we are so excited to welcome back most of our original design team members for year two, we are saddened to be saying goodbye to Audrey Yeager. Audrey has creatively embraced every challenge over the past year, and has been a super part of our design team over the past 12 months. We hope your will continue to stop by her blog and see her gorgeous creations. Thank you Audrey for sharing our journey – we are grateful for you!

Audrey here.  I just wanted to say that I LOVE where IE has taken me this last year!  It was such a pleasure to work with everyone in this group and to grow and support each other as "artists".  I have loved watching everyone evolve over the year and had so much fun tackling these challenges!

We are very pleased to announce a new member to our design team. Join us as we welcome Jodi Wilton. Jodi's design style is happy and whimsical and we are looking forward to sharing this new year of growth with her and seeing how her creative muse is tickled by our challenges.

We mentioned RAKs or giveaways at each designer’s blog this month,since we’re celebrating our first year. Please read each designer’s instructions regarding the giveaway as they will vary. We will post a final list of winners on April 24th on the Inspiration Elevator blog, so be sure to pop back, and if you create something based on this month’s challenge, please link it up on the blog!

I got to lift: Lisa Spiegel

I have known Lisa for quite some time in the scrappy world, but I can honestly say I don't remember where or when we "met"!  I'm sure it was a long time ago on some club team or message board!

I loved looking through Lisa's blog at her recent work.  Actually, I scrolled through her blog all the way back to just a little over a year ago.  One thing I noticed is that her scrapping has become some much more detailed and she has added a lot more layers to her pages!  Just going through the first couple of recent pages on her blog, I found these layouts that caught my eye:


Do you notice a pattern?  :)  What caught my eye was the doilies on each page.  With 3 girls, I am sure she loves "girly" things!  Also, the basic design of these pages is a large, single photo with layers of papers and embellies, and then a smaller cluster off to the side somewhere on the edge of the page.  Three out of four of these pages have butterflies and they all have flowers.

So instead of lifting a particular layout of Lisa's, I lifted her style and came up with this:


I started by pulling out a doily and then fussy cutting the bright pink flowers.I dug through some old Scrapbook Circle kits and pulled out some aqua, beige, and pink elements to work with.


I just started layering papers and embellishment with my photo, working with the flowers and doilies, too.  I stuck with one main cluster of layering around my photo, like Lisa does, and then added an "off the page" element on the lower left corner.


To add some "me" to this page, I used a stencil with some Art Anthology paint and also splattered some white paint as well.  I noticed that Lisa also outlines her layouts a lot, or frames them with another piece of paper, so I stitched a black frame around the outside with my machine.


Then I needed to find a butterfly for my page and this one from the Crate Paper Maggie Holmes die cuts was perfect!  The black in it really drew out the black in my photo.  Then the black title creates a visual triangle.  Voila!

I really really loved this challenge!  I can't tell you how quickly this page came together, and I loved getting in touch with my girly side and using doilies and butterflies!  Thank you LISA for the inspiration!

*GIVEAWAY*

Now, for my blog hop PRIZE, I will choose one random FOLLOWER who comments on this post.  In addition, you must also follow the new Inspiration Elevator blog and leave a comment there, too.  Up for grabs is this hod podge of duplicate scrappy stuff that I have!  It kinda makes a nice kit!

Winner will be announced April 22 here and on the IE blog.


Stop by and see what the designers on this adventure have created:

Sunday, April 14, 2013

April Paper Issues Kit-Lucky You

I am so excited to share the new Paper Issues http://paperissues.blogspot.com/kit for April!  Paper Issues will be releasing a new kit quarterly.  I am proud to say that I co-designed this kit with Carol Monson!  We focused on some bright, fun, primary colors and wanted to have a variety of embellishments.


And guess what???  You can save 20% right now by typing in the code AUDREY in the Paper Issues shop!  That's 20% your ENTIRE purchase!


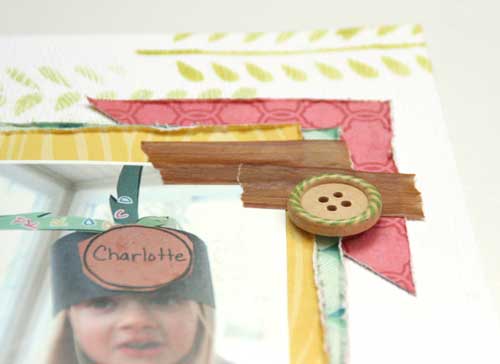
Here is a page I created with this kit.  Charlotte had a "Chicka Chicka Boom Boom" day at school and I thought that the green paper in this kit would make great coconut tree leaves!  :)


I cut the leaf shapes by hand and then just snipped along the edges to create the fringe.  Then I stitched down the center of each leaf.  I didn't want the ends of the pins to stick out the other side of the wooden button, so I just bent the pin in half (which is hidden under the button).


I used the vine stencil included in the kit and some different shades of light green inks.  The wooden buttons in the two photos below are NOT part of the kit, but I just wanted to have a few more wood pieces on my page.

 I used my Cricut to cut the title from the multicolored vellum.  The font is called Dunkin' Sans.


Want to see some more lovely projects using this kit!  Check out the ladies blogs below!


Carol Monson
Sara Zenger
Anna Sigga
Kate Vickers
Jen Chesnick

And for more fun, here is a little video that Anna Sigga put together showing you the contents of the kit!


Stay tuned to my blog for some more projects with this kit, and who knows, maybe you will have a chance to win one in a few weeks! ;)

Stay scrappy my friends!

Friday, April 12, 2013

An Easter (2012) Mini

Hello everyone! I wanted to share a project that I recently made for Basically Bare.  It's a little mini  about an Easter event that I took my kids to last year. Yes, I am scrapping last year's photos! (When a particular "season" rolls around, I like to look at my photos from the year before and scrap them!)


I started with a Pocket album, and took it apart to cover the pages and stitch on the pages.The design on each page is fairly simple: a piece of patterned paper on one edge, a 2nd piece punched with flower shapes on the other, and a striped piece down the seam of the 2. I machine stitched around the edge of each page, too.


 Then I cut a doily with my electronic die cutting machine and placed it on each page. I just added some photos and some simple flowers and stickers here and there. The journaling is on a tab in the back of the album.


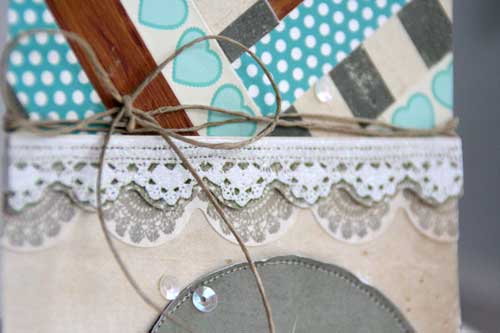
For the cover, I covered it with patterned paper and then with a piece of lace. Then I splattered it with paint. I layered some stickers, fussy cut patterned papers, buttons, and twine.


This album was also featured in the latest edition of Paper Haus magazine, which you can see HERE!
Stay Scrappy my friends!


Friday, April 5, 2013

Waiting for Spring and playing on the porch...(and a winner)

I owe you a winner from last weeks' Glitz Designs Blog Hop!  And here she is:

Congrats Margie!  Please contact me at my address in the "About Me" tab with your address and I will send your prize out to you!


It's been so cold here in NY this spring, and my kiddos have been itching to get outside. We had a "warmer" day (and i mean a day above 32 degrees! :) ) and the sun was out which warmed up our sun porch. So we went on the porch and played for a while!  They got out the wagon and took turns pulling each other around.

I used today's sketch from the My Scraps & More Sketch blog, which you can find HERE!


I am so in love with the colors in the American Crafts Dear Lizzy Lucky Charm line!  The mint, navy, bright coral, sunshine, and pink and just an awesome combination! Here it is in the store: AC Dear Lizzy

I cut apart the chevron paper into smaller bits and then stitched down the centers.  I scattered them around the page to draw attention to different areas.  I also have a Crate Paper Maggie Holmes fabric frame in the background here:


I splattered some mists on the background, and then cut some strips of paper for the bottom of the page. I also used some rub-ons, chipboard, die cuts, and stickers from this collection, too!


Hope spring is coming our way, soon!
Stay scrappy my friends!


Saturday, March 30, 2013

Step by Step Saturday with Glitz. Washi pattern card...

Hello everyone!  I have a really easy way to create a fun pattern with some washi tape to use on a card, tag, or layout!  I created mine on a standard card base size- 4 1/4" x 5 1/2".  You will need at least 2 patterns of washi.

1. Draw a pencil line down the middle of your base.  You are going to add a piece of tape at a 45 degree angle to your pencil line.  Now, I just eyeballed mine, however, I noticed that my final design was a bit skewed, so it is important that you get a 45 degree angle (time to break out the protractor!).


2.  Now you are going to add your 2nd piece of tape to the other side, going in the opposite direction.  You want the corner of this 2nd piece to be right on your pencil line.  Be sure to cut the end of the washi in a straight line to give it a clean edge.


3. Alternating sides, keep adding strips of washi.  Make sure you stick to the same pattern/order of tapes on each side.


4. After your area has been totally covered, turn your base over and trim off all the excess tape!


5.  Now you can use it as a card base, cut out a tag shape, or even as a piece of patterned paper on a layout!

Here is a simple card I made using my base.  I kept it simple because of the busy pattern that I really wanted to stand out!


Thanks for stopping by and have a wonderful Easter Weekend!

-Audrey Yeager


Friday, March 29, 2013

Catching some Waves! Fancy Pants

For the Glitz Designs Blog Hop, please see the previous post HERE.

We just got back from a trip to Florida where we spent some time at the beach!  I have been really itching to start scrapping warmer weather photos, and these Fancy Pants "Down by the Shore" papers were just perfect for my photos!  Charlotte just loves the water, and she was a bit scared of the waves at first, but quickly got over it.


My layout today is based on a sketch I created for the My Scraps & More Sketch-A-Thon.  I rotated the sketch to make the banner pieces look more like flags.


I really layered on the banner pieces, and turned them sideways.  I thought they looked like flags this way.  Each little piece was distressed a bit to add some more texture.


On the background, I wanted to give an feeling of water being splashed, so I used some white modeling paste and some glitter paint with a stencil. Then I splattered with navy and aqua mists.


Only 2 more days for the Sketch-A-Thon!

Hope you have a wonderful Easter weekend!  Stay scrappy my friends!