Showing posts with label die cuts. Show all posts

Friday, July 17, 2020

Altenew July 2020 Stencils/Enamel Dots/Creative Cutouts/Decals Release Blog Hop + Giveaway

Welcome to the Altenew Blog Hop featuring some new releases for July 2020, including Stencils, Enamel Dots, and Creative Cutouts!  


You should have arrived from Lydia Evans blog. You can see the full hop list below.

You can find the beginning of the blog hop on the Altenew Blog HERE. And of course the Altenew store has all the new releases in stock!


I began my process by creating the circles from green cardstock and the "Geometric Landscape Stencil".  I blended a few different colored inks, then punched and cut out the circles.  I inked and distressed the edges as well.


For my background, I gessoed white cardstock, used some yellow mists and a watered brush, and then used the "Cloud Scene Stencil" to add some dimension and layers of color.


I machine stitched the circles onto the background, and then used blue and green mists to color the "Nested Wreath Creative Cutouts".


For the final details and embellishments, I used Wood Veneer that I inked orange, a phrase stamp from the Morrocan Tile stamp set, some of the new "Tropical Forest Enamel Dots" and some labels from my stash. 

You can watch my entire process in the video below:


GIVEAWAY:

To celebrate this release, Altenew is giving away a $30 gift certificate to 6 lucky winners! Please leave a comment on the Altenew Card Blog or/and Altenew Mixed Media Blog by 7/23/2020 for a chance to win.


We’ll also draw a winner to receive a $15 gift certificate from the comments left on each designer’s blog on the blog hop list below. All winners will be announced on the Altenew Winners Page on 07/26/2020.


Blog Hop Order:


Altenew Card Blog

Vicky Papaioannou

Amber Rain Davis

Amanda Baldwin

Therese Calvird

Kelly Janes

Laurie Willison

LauraJane

Norine Borys

Mindy Eggen

Ashlea Cornell

The Hedgehog Hollow

Altenew Mixed Media Blog

Elsie Robinson

Virgninia Lu

Terri Koszler

Lydia Evans

Audrey Yeager

Tania Ahmed

Amy Hill

Nikki Kehr


Please head over to Tania Ahmed's blog now! 

Thanks so much for stopping by!


Thursday, March 10, 2016

March Page Maps and Just Nick cut file

Hello everyone!  Have you see the wonderful sketches this month on the PageMaps site?   It is always one of the first stops I make each month when I am looking for sketches to use!  

The Just Nick DT got to work with the sketches AND use awesome cut files from the shop!

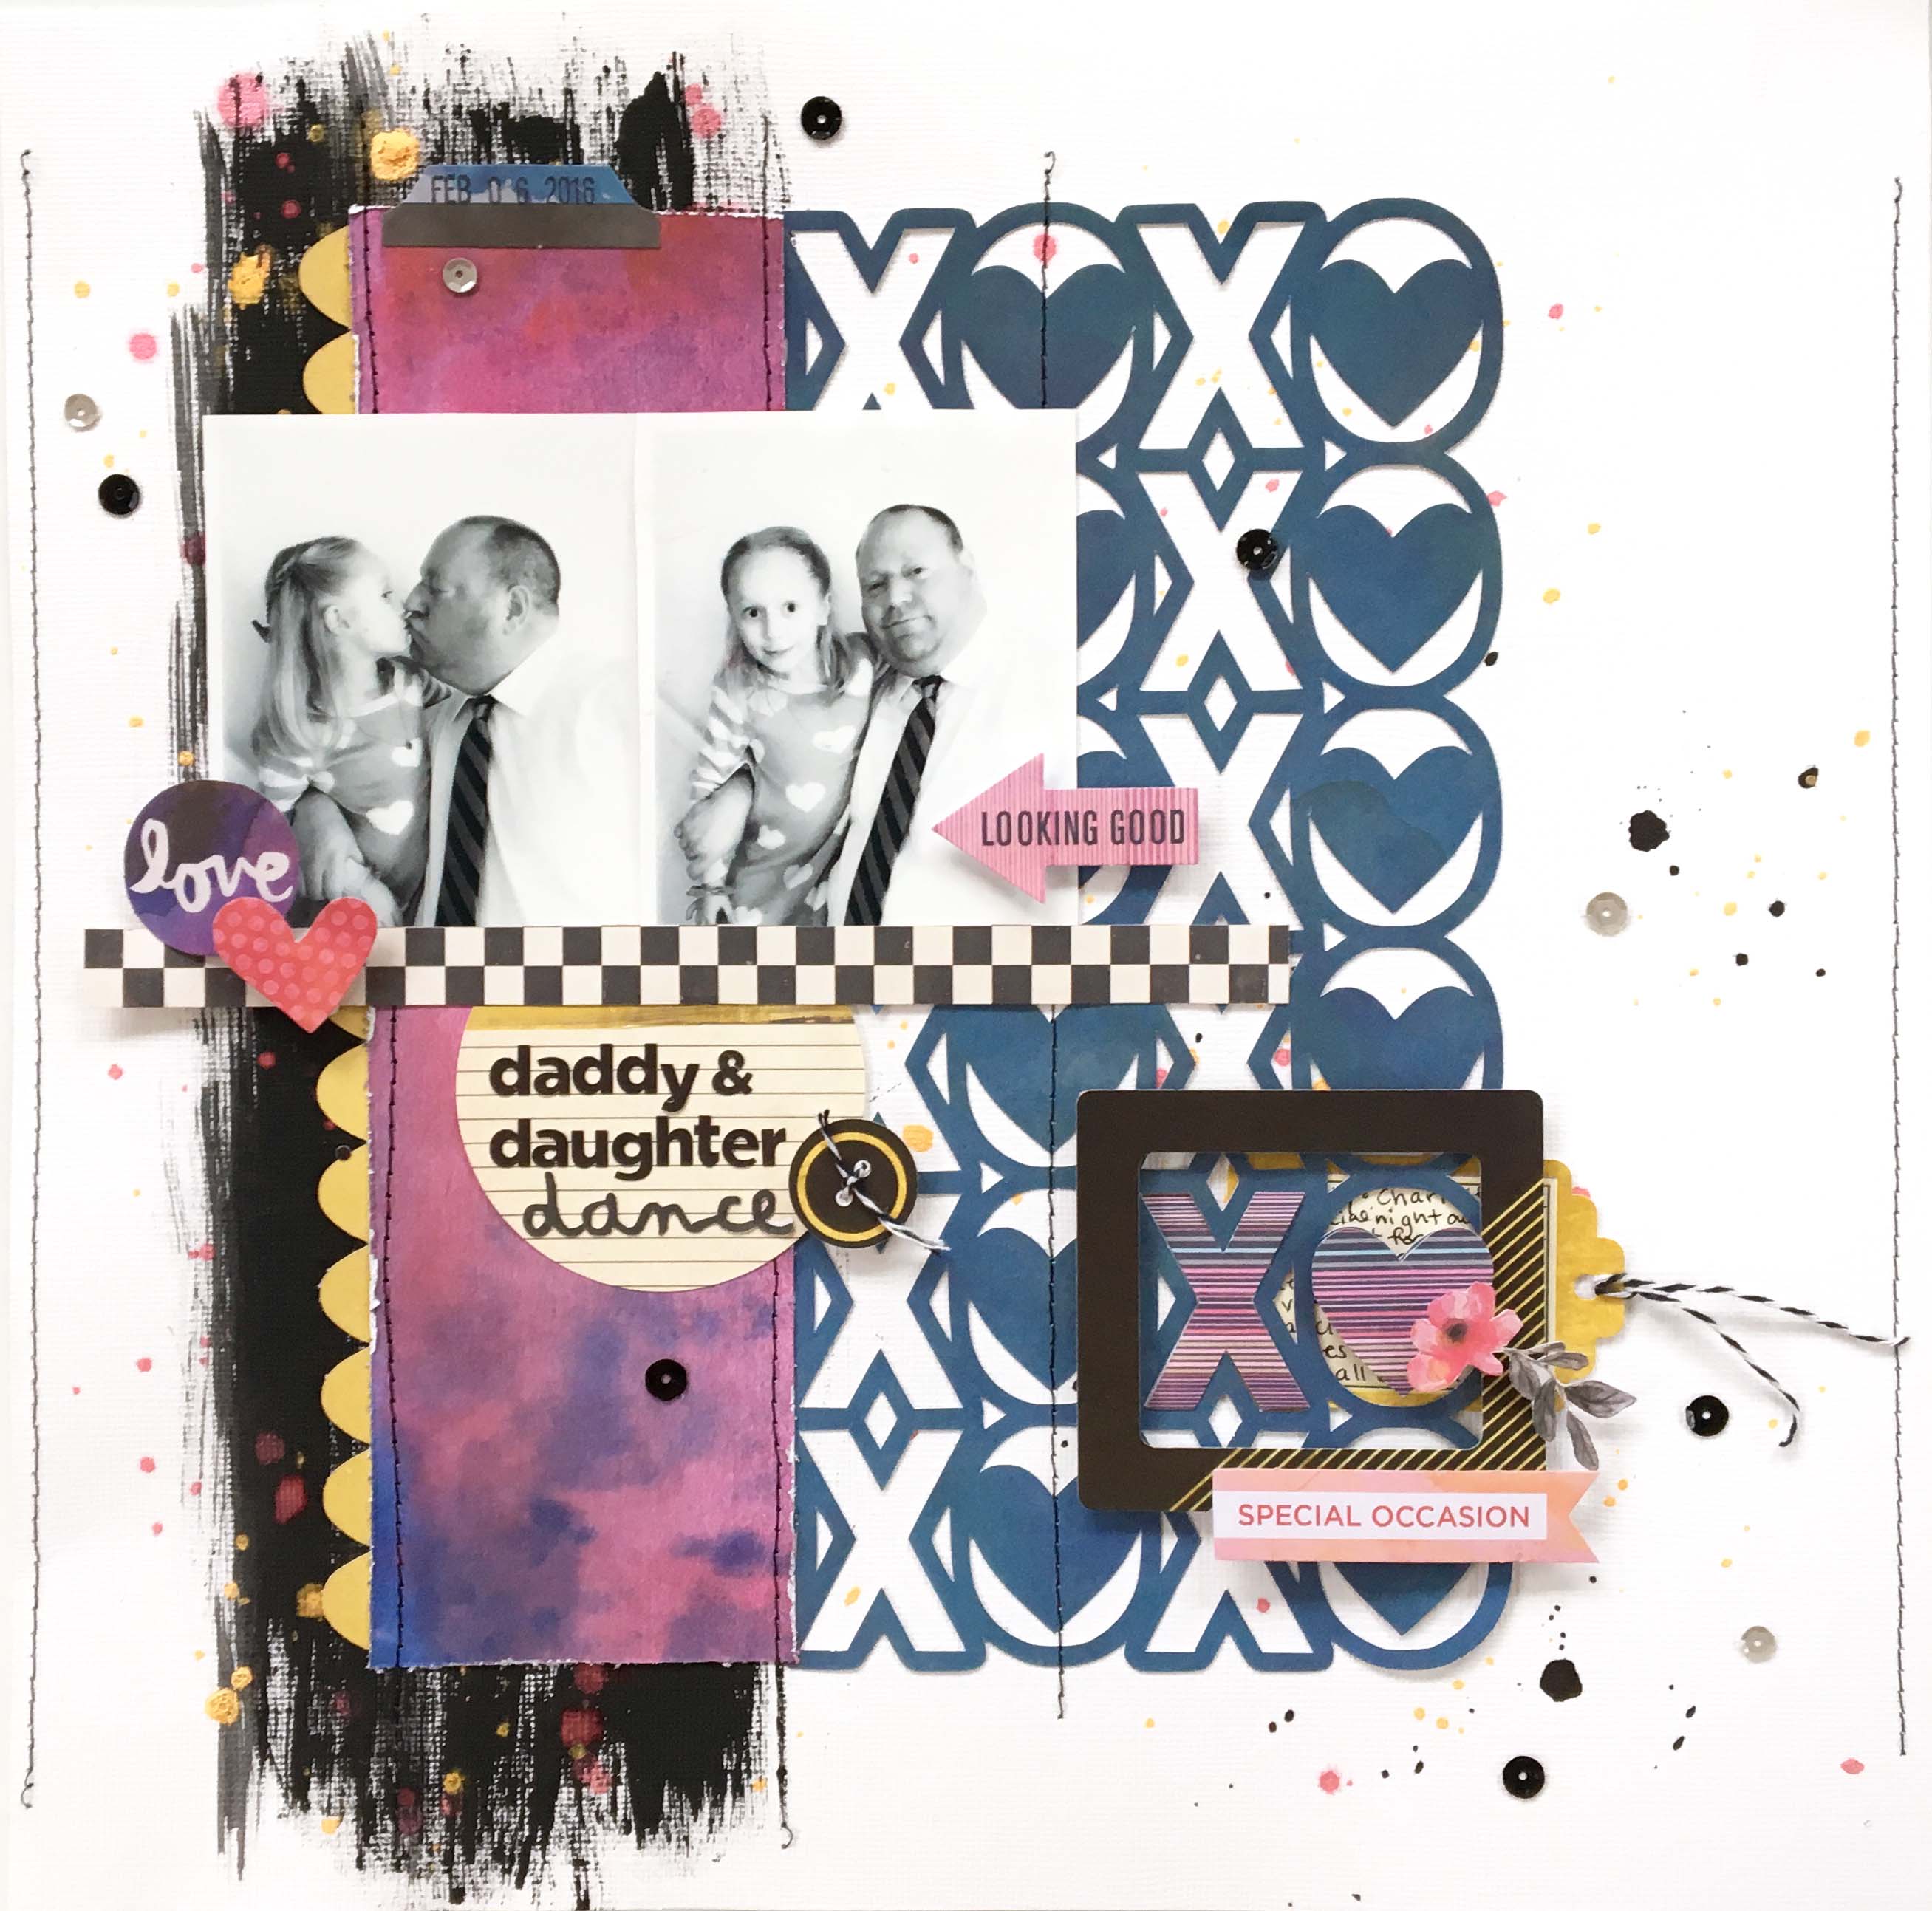
I created this page with one of Becky's sketches (which you can see HERE) and the XO Heart Background file from the store.   I used the new Urban Luxe collection from Basic Grey. 

Charlotte and Daddy got to have a special night out for the Daddy Daughter Dance.  They went out to dinner first and she got to choose anywhere she wanted.  She chose a diner!  They went to Mel's Diner and she had a burger and fries!  Then it was off to the dance for snacks, crafts, a photobooth, and of course dancing!


I followed the sketch pretty closely, using a large swipe of black paint to help balance be design.


I created an interesting embellishment cluster by layering an "X" and an "O" cut out of different papers and a frame to tie it all together.  My journaling is a tag that is tucked under this cluster.


This is a unique and different color combo for me!  I loved layering these colors and bits from the Urban Luxe Ephemera pack!

Check out the XO Heart Background cut file in the shop HERE:


Thanks for stopping by and be sure to check out this month's Page Maps!

Stay scrappy my friends!


Wednesday, April 29, 2015

Create your own sunshine! Weekly Scrapper at Scrapbook Expo blog!

Hello there!  I am so excited to share that I was asked to contribute as the Weekly Scrapper to the Scrapbook Expo blog this week!  I had to make a special project exclusive for the blog, and I get to finally share it with you today!  

You can check out the Scrapbook Expo blog HERE for some more details about this project, a few of my other favorite pages, and a little Q & A about me!  

So this was the first real *warmer* day of spring, and my daughter came running off the bus, whipping her coat off yelling, "It's SUMMER!  It's SUMMER!"  It was really about 50 deg. F.!  lol.  But she was full of energy, and after a long winter, the sunshine just does that to you!


Now, honestly, I DON'T dress my kids to match my scrapbook papers, but the navy shirt my daughter was wearing in these photos just went so well with the Saffron Yellow collection from Jillibean Soup!  You can see the collection HERE in the My Scraps & More store.

The first thing I wanted to do was cut out these beautiful flowers from the patterned paper.  So I fussy cut the large flowers and then popped up some smaller flowers in the middle with tiny black brads for centers.


My background is a white on white flower die cut with a floral cut file from the Silhouette store.  Once I glued the die cut down, I machine stitched inside some of the flower shapes to add some texture and interest.


I am so honored to have been asked to contribute to the Scrapbook Expo blog!  You must check it out!  There is a ton of inspiration there!

Stay scrappy my friends!

Wednesday, April 23, 2014

What's In Your Basket?

Last Easter, we spent the day at Grandma & Grandpa's and the Easter Bunny hid some eggs and baskets there!  Of course the thing the kids were most interested in in their baskets were the candy filled plastic eggs.  And of course you have to compare to make sure you got the same thing as your sibling.


I used the Dear Lizzy Day Dreamer collection for this page and it is based on a sketch by Melissa Elsner.  You can see on my title letters above that I tried to create an ombre effect by using a stamp pad on the white letters, and stamped darker from right to left.


I used an egg cut file from the Silhouette store to create my eggs from white paper and vellum.  Since the flower paper was so busy, I decided to keep the eggs white.


Finally, to ground the photo more, I stitched a large circle in the background.  And for embellies, I fussy cut out some of the flowers and leaves from that floral print paper...yes, it took a while!


Hope you had a wonderful Easter!!!

Stay scrappy my friends!

Friday, December 27, 2013

Oh Christmas Tree Oh Christmas Tree.....

...how lovely are thy branches.....

We seriously got the fattest Christmas tree EVER!  It took three men to pull it through the baling machine!  This is the first time we've put a tree in front of our bay windows, and it looks so beautiful!


 I really wanted the photo to stand out on this page, so I used minimal patterned paper and a white background.  But I wanted to add some interest to the background, so I created a cut file using SCAL2 and a font called Sego Script.  I welded the letter together and cut it out on my Cricut.


I added a few splatters of paint under the large title on the white cardstock to make it stand out just a bit more. I didn't do any journaling on this page because the title pretty much says it all!  :)


The design of this page is based on a sketch at Stuck?! sketches, which you can see HERE, and a color combo challenge at My Scraps & More.  I used die cuts from Simple Stories, papers from Webster's and Basic Grey, and gold stars from Studio Calico.


I also used a few vellum pieces and tags from Pink Paislee, and a wood veneer circle that i misted green to balance the page a bit.


Stay scrappy my friends!


Sunday, November 24, 2013

Photobooth FUN!

In June we went to a wedding and at the reception, the bride and groom had a photobooth set up with props and hats!  You went into the booth and there was a series of 4 photos.  Two copies of the photos were printed.  One copy went into the bride and grooms' scrapbook, and the other we got to keep!  I thought this was just and AWESOME idea!  There were a LOT of funny (and some inappropriate  :)  ) photos by lots of my family members!  :)

When I saw the latest sketch at Skissedilla, it remind me of these photos, so I pulled them out and made a page!  I used the new Amy Tan line, Cut & Paste, which was perfect!  This page was really really easy and simple!

 The background paper is already patterened like that with the yellow and pink and red strips.  I just added the thin blue strip in the yellow part and stitched over it.


I thought that the page needed some sparkly stars and some glitter to go along with a "photoshoot" theme.  I used some of the plain chipboard pieces from the Amy Tan collection and covered them with mod podge and then sprinkled them with loose silver glitter.


Other than that, just a few mist splatters and clusters of embellies here and there!


Lots more to share this week so stick around!

Stay scrappy friends!!!


Sunday, October 27, 2013

A few more from Scrapbook Circle for October... sleeping bags and playground peeks...

It's gettin' near time to wrap up the month again!  I say it every month, but where did this month go???


I'm sharing with you two more projects from the October Scrapbook Circle kit.  I LOVE LOVE the colors in this kit...bright and fun!  And of course my favorite manufacturers', too!

On my layout below, I wanted to use some design ideas inspired by the sleeping bags my kiddos were in.


So I folded down the corners of the paper, much like the top of a sleeping bag gets folded before you snuggle into it!  Behind it, I just added a small scrap of the arrow paper, which gives some great eye movement across the page.


 I wanted to see if any of the exclusive wood bits fit on my page, and as I emptied them out of the bag, I thought to myself, WAIT, sleeping bags=canvas bag=perfect!  So I used the canvas bag as part of my page design instead!  It was a perfect spot to tuck a little journaling card!

cozy-sleeping-bags-1

Don't forget to use your bag, too!!!  You could use it as an "off the page" item as well.  I bet it would work great with the exclusive Scrapbook Circle stamps to create a new design!

And finally this page I did based off of Diana Fisher's sketch for the month.  I just love that girls sketches!!!


The sketch has 3 photo, but I only had two, so I turned the third into a matching journaling area!   On the background, you can also see some light stenciling I did with the NEW exclusive stencils from the SBC kits.  Awesome!


I just layered some papers and a fabulous bright pink die cut from the Amy Tan Cut & Paste collection and then added the black arrows for movement.  There's a bit of stitching and I LOVE LOVE those Heidi Swapp sequin Rub ons!!!    Oh and how about the exclusive wood veneer die cuts.  Uh huh....love those, too!


I am working on my November kit right now and I can NOT WAIT to share it with you!  It is one of my favorites lately!

Stay Scrappy my friends!

Friday, October 11, 2013

September Scrapbook Circle Projects (yeah..i know....its October)!

Can I tell you how happy I am to be a part of the Scrapbook Circle Team again????  I love love working with the kits!

Somehow, my post with my September projects never got posted, so here they are!

Here is my page of Kyler using the vacuum.  He LOVES the vacuum...whenever there is one out, he has to be using it!  I hope this continues through his teenage years!  :)   When we leave grandma's house, he even says goodbye to her vacuum!

Many times when I am working on a page, I try and use something from the photos to inspire my design and the products I use.


I thought of what a messy floor looks like when right before you vacuum it up (specifically, the area around my scrap space! HA!). Strings, and scraps and maybe a few drops of paint or mist splattered here or there. So those are exactly the things I used on my page!


I used a grungy stamp and some charcoal ink around the edges of my page in some spots, then just took some clusters of strings and layered them under my scraps of paper. I machine stitched over some of the strings to help keep them in place.


This was based on the Sept. sketch on the SBC blog.


This kit comes with an entire box of Fancy Pants cork arrows, which just add so much depth to a page. You can paint them or mist them to match your pages, too!  Here I wanted to do something creative with them.  Kyler turned 2 in July, and I wanted to use a big #2 on my page as a focal point.  I thought the cork stranding out against the black and white stripes made for good contrast!


I started by cutting a large #2 on my Cricut and then covered it with the small cork arrows.  Then I simply trimmed the edges of the arrows off by turning the number around so I could see from the back where the pieces were off.  I then inked the edges in black to make it stand out a bit more.


I matted behind the frame a bit by adding some strips of the grey washi tape in the kit. The rest of the page I kept pretty simple by added a banner with some brightly colored pieces.    This was about the 3rd or 4th birthday page I did of him, so I decided not to add any journaling this time.


Sometimes I find Polaroid frames challenging because my photos dont seem to fit right, so I used them to create an overlapping grid pattern on this page.  Charlotte actually took the photos of Kyler and I...he took my glasses and put them on and then gave me his.  And of course, Charlotte then wanted to switch, too...


I added a bit of depth with some tone on tone cork elements on the cork paper.  Lots of fun bits and pieces on this page!


And lastly, this fun fun page that was actually inspired by a TISSUE box that I bought for Charlotte's room!  You can read more about it HERE on the SBC blog.


I designed and cut the pattern with SCAL2 on my Cricut and then added patterned papers behind the cut outs.  Some of the cut outs I purposely left empty and instead popped some white cardstock from the back to give it depth.


Just a few other elements like buttons and twine.

And faux stitching to highlight some areas of the page.


Did you know that you can save TWENTY percent off your order at Scrapbook Circle (subscriptions not eligible)?????   Just enter the code Audrey20off at the checkout!  Happy Shopping!

Stay scrappy my friend!

Monday, July 22, 2013

Oh Happy Day!- Fancy Pants

So I recently got me a good stash of Fancy Pants "Wonderful Day" and "Memories Captured" papers from My Scraps & More.  I finally got to dig into them and love these bright colors in the Wonderful Day collection for some of my fun summer photos. I'm entering this in the Fancy Pants and Gossamer Blue GDT challenge.

We were playing outside a few weeks ago playing "chase" and I tackled Kyler, pinned him between my feet and starting tickling him!  He was laughing so hard.  And I happened to have my camera around my neck!  :)


This page is designed mostly around just embelllishments!  The only patterned paper I have is the background paper, the yellow "mats" behind the photos, and the one colored strip in the bottom right of the page.


I applied a wash of gesso to the background, misted through a small circle stencil with a grey mist (decided I didn't like it them went over with white gesso again!) and then splattered with yellow and blue mists.


I popped off a whole bunch of the die cuts (arrows, titles) and pointed them to the photos to draw your eye there.  A little stitching here and there, too.


I added a few stickers and LOVE the cork stars and hearts!!!!  Oh, and who could forget the flair?  The one in the top left is Fancy Pants and the bottom right is Scrapbook Circle.

My blog is going to be busy this week with projects and an announcement!!!!  Please stop back!

Stay Scrappy My Friends!

Sunday, April 21, 2013

Papers Issues ftg. Elle's Studio 'Serendipity" *blog hop*

A new theme is up this week at Paper Issues and it is all about "Serendipity" (anyone remember that movie?). Anyways, when I typed in "serendipity" into a google search (because I didn't know how to spell it correctly)  I see that part of the definition says "happy accident".  I LOVE happy accidents when it comes to scrapping, and I wish I could say I had one on this page, but there were no "accidents" this time around...everything was as planned!  Although I did use all Elle's Studio 'Serendipity' products:


I based my page off of a sketch at Skissedilla this week.  I loved the scattered photos on the page, and I had a lot from this little "shoot", so it was perfect! We have a GREAT climbing tree in our new backyard, and Charlotte felt like she was up so high (but she was about 3 feet off the ground) :).


On the background, I painted with a wash of gesso mixed with some light blue paint, then I splattered some yellow and green mists.

Over that, I added some white washi tape and some washi with gold little dots.  Then I took a stamp from Elle's Studio and stamped the "So lucky to have you" sentiment over and over again.


 A few fussy cut flowers and a great scattering of tags and she's done!  Not a lot of paper on this page, but still a lot of little details and colors!

So if you have a project that is "serendipitous", or perhaps one of these other themes, you should link it up to Paper Issues:

Chance
Fate
Destiny
Luck
Fortune
Kismet

OK, now hop on to these other fine ladies blogs and see some more Elle's projects!


Amy T.: http://tsurutadesigns.blogspot.com/
Audrey: http://audreysreflection.blogspot.com/   <---you are here
Diana: http://designbydiana.blogspot.com/
Leslie: http://leslieashe.blogspot.com/
Melissa: http://www.missygener.com/
Pamella: http://happytobecreating.blogspot.com/


Thanks for hopping with us today!

Be sure to do the following:

 1. Like Elle’s Studio on Facebook {tell them we sent you}
2. Like Paper Issues on Facebook
3. Leave a comment

****************************************************************
Oh, and one more thing before I go....another page with the "Lucky You" kit from Paper Issues!  Last time I checked, there was only one kit left!

We have a lot of beautiful gardens at our new house and it is fun waiting to see what is popping up this spring.  I let the kiddos each pick a daffodil and they thought it was the best thing....:)


Sometimes if I am not sure where I am going with a page design, I just start fussy cutting and as I am cutting, I think about it more and more.  That is what I did here:  I just started cutting the flowers and the page took off from there!  I love how awesome the seam binding is for making bows!!


Remember, you can always save 20% off your purchase at the Paper Issues store by using the code AUDREY!

Stay scrappy my friends!