Showing posts with label die cutting machine. Show all posts

Thursday, March 10, 2016

March Page Maps and Just Nick cut file

Hello everyone!  Have you see the wonderful sketches this month on the PageMaps site?   It is always one of the first stops I make each month when I am looking for sketches to use!  

The Just Nick DT got to work with the sketches AND use awesome cut files from the shop!

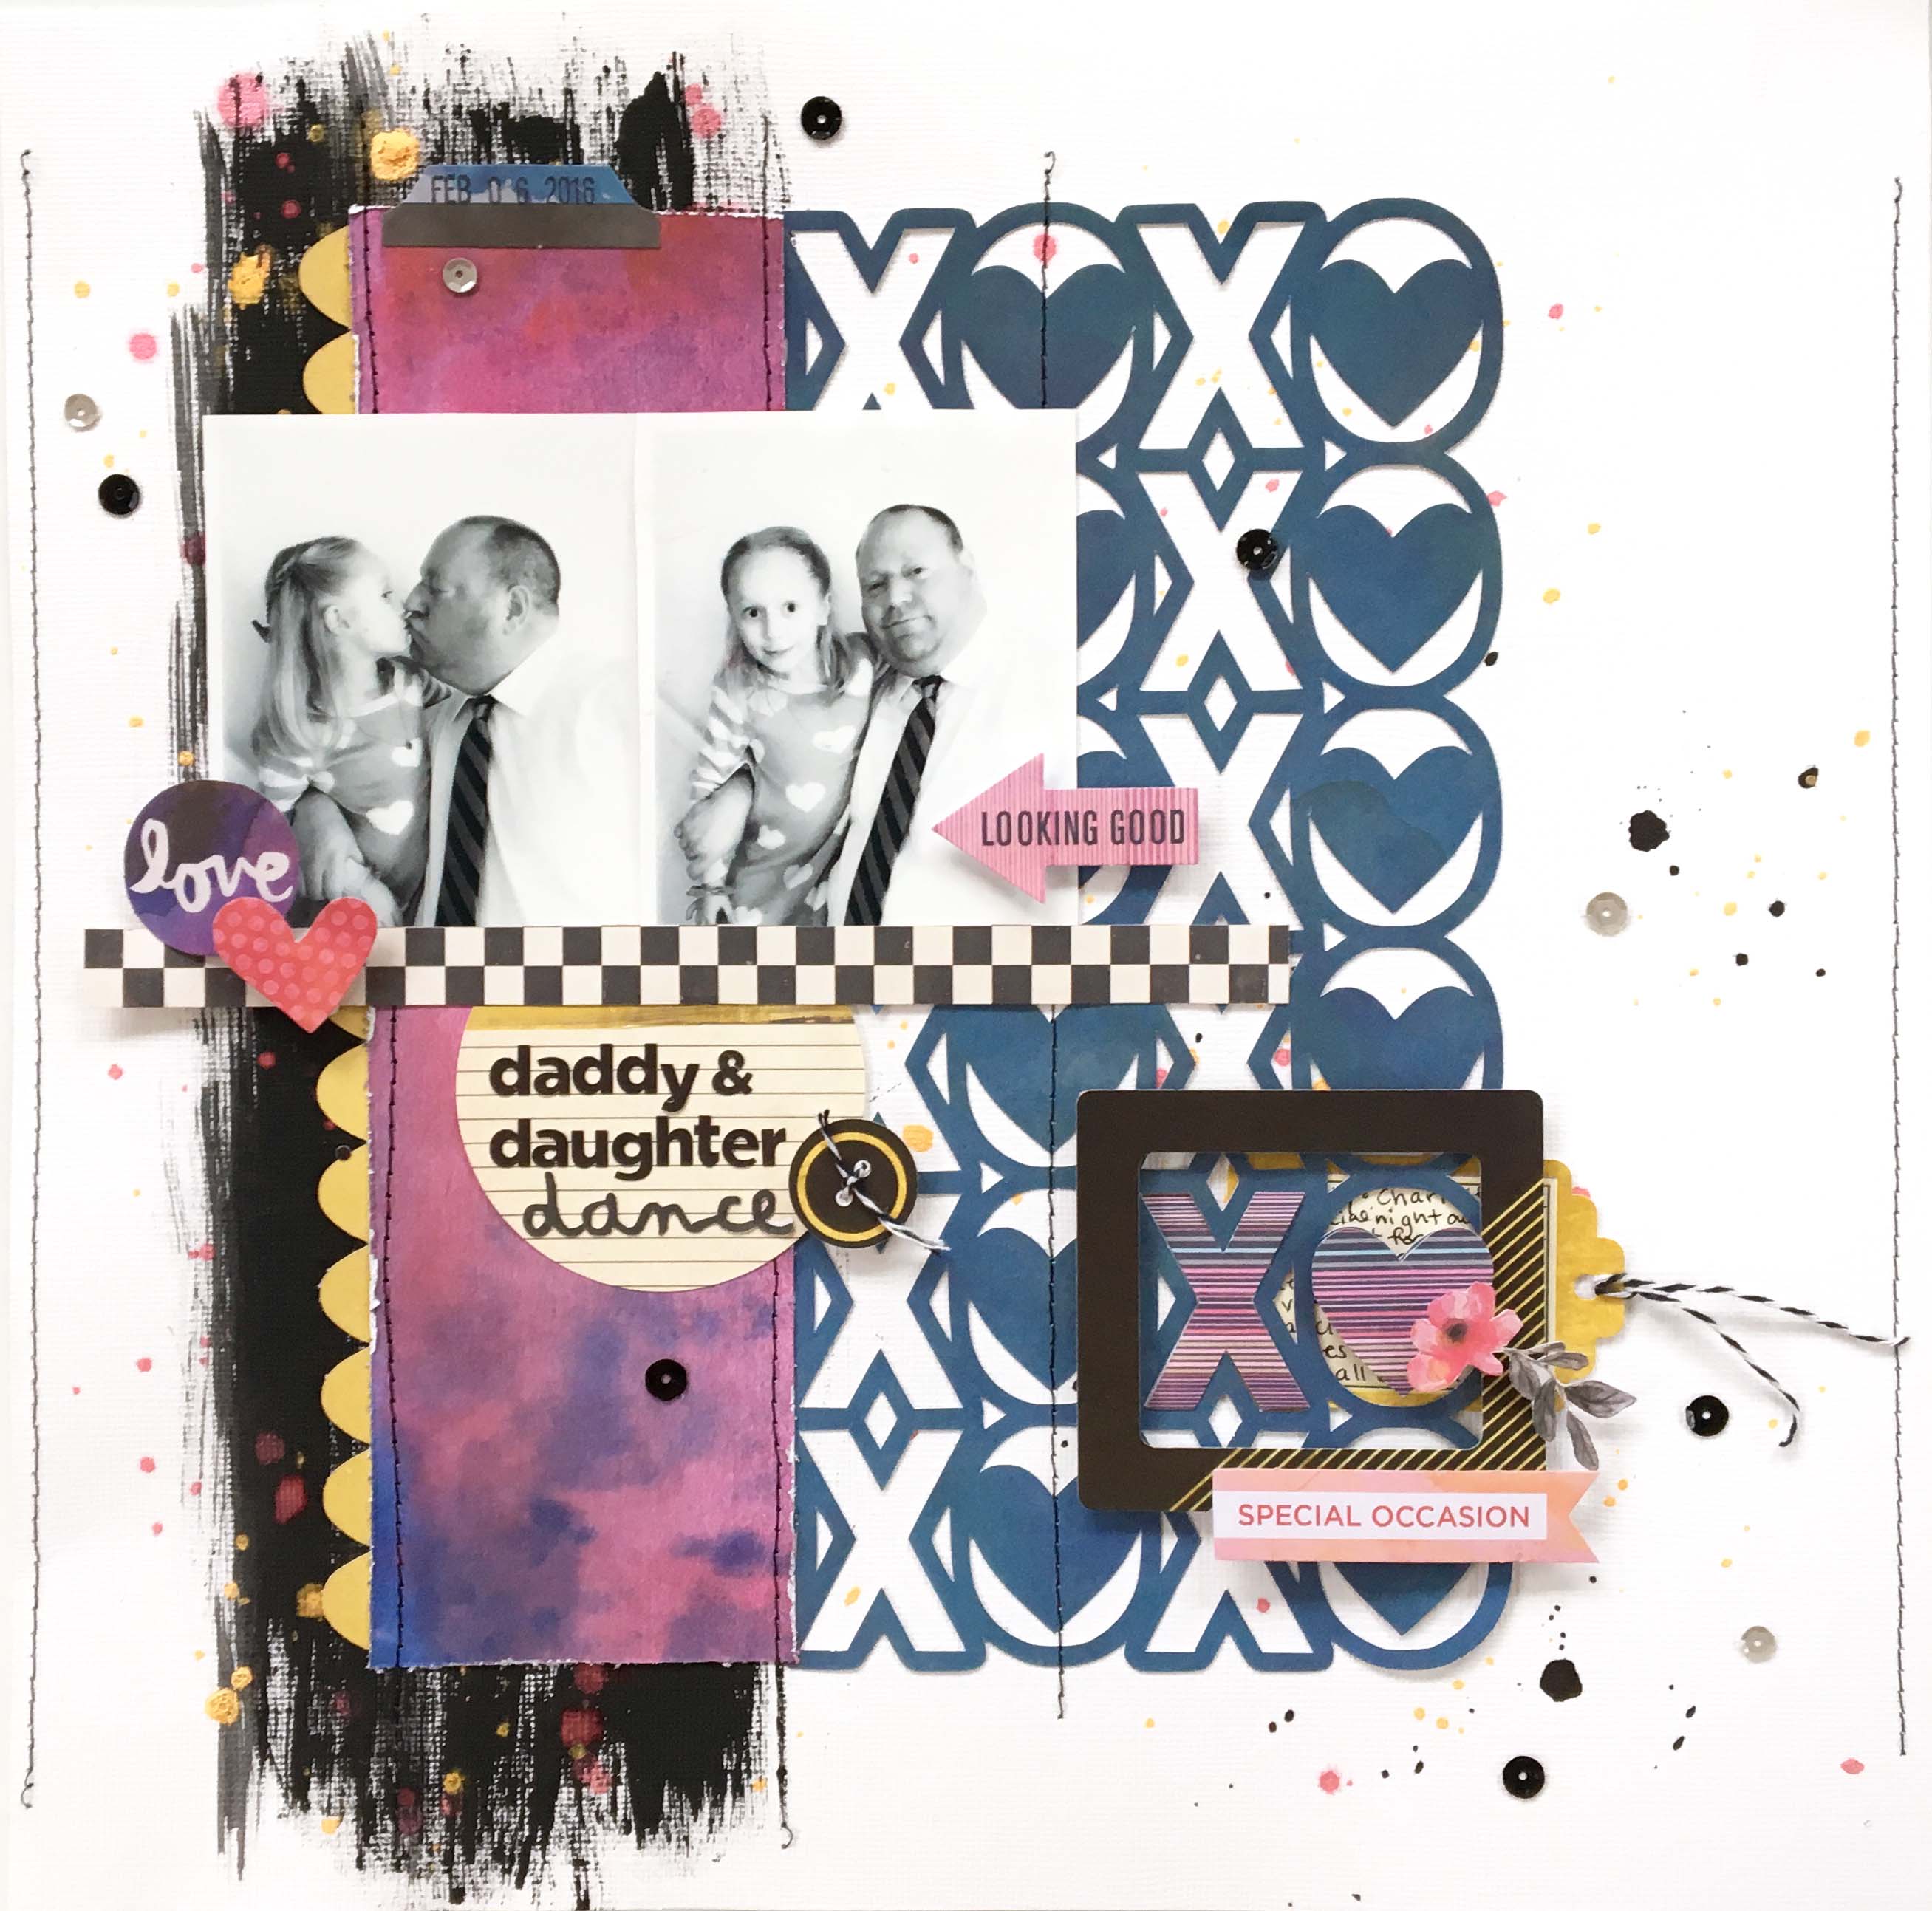
I created this page with one of Becky's sketches (which you can see HERE) and the XO Heart Background file from the store.   I used the new Urban Luxe collection from Basic Grey. 

Charlotte and Daddy got to have a special night out for the Daddy Daughter Dance.  They went out to dinner first and she got to choose anywhere she wanted.  She chose a diner!  They went to Mel's Diner and she had a burger and fries!  Then it was off to the dance for snacks, crafts, a photobooth, and of course dancing!


I followed the sketch pretty closely, using a large swipe of black paint to help balance be design.


I created an interesting embellishment cluster by layering an "X" and an "O" cut out of different papers and a frame to tie it all together.  My journaling is a tag that is tucked under this cluster.


This is a unique and different color combo for me!  I loved layering these colors and bits from the Urban Luxe Ephemera pack!

Check out the XO Heart Background cut file in the shop HERE:


Thanks for stopping by and be sure to check out this month's Page Maps!

Stay scrappy my friends!


Thursday, February 25, 2016

Hello Happiness!

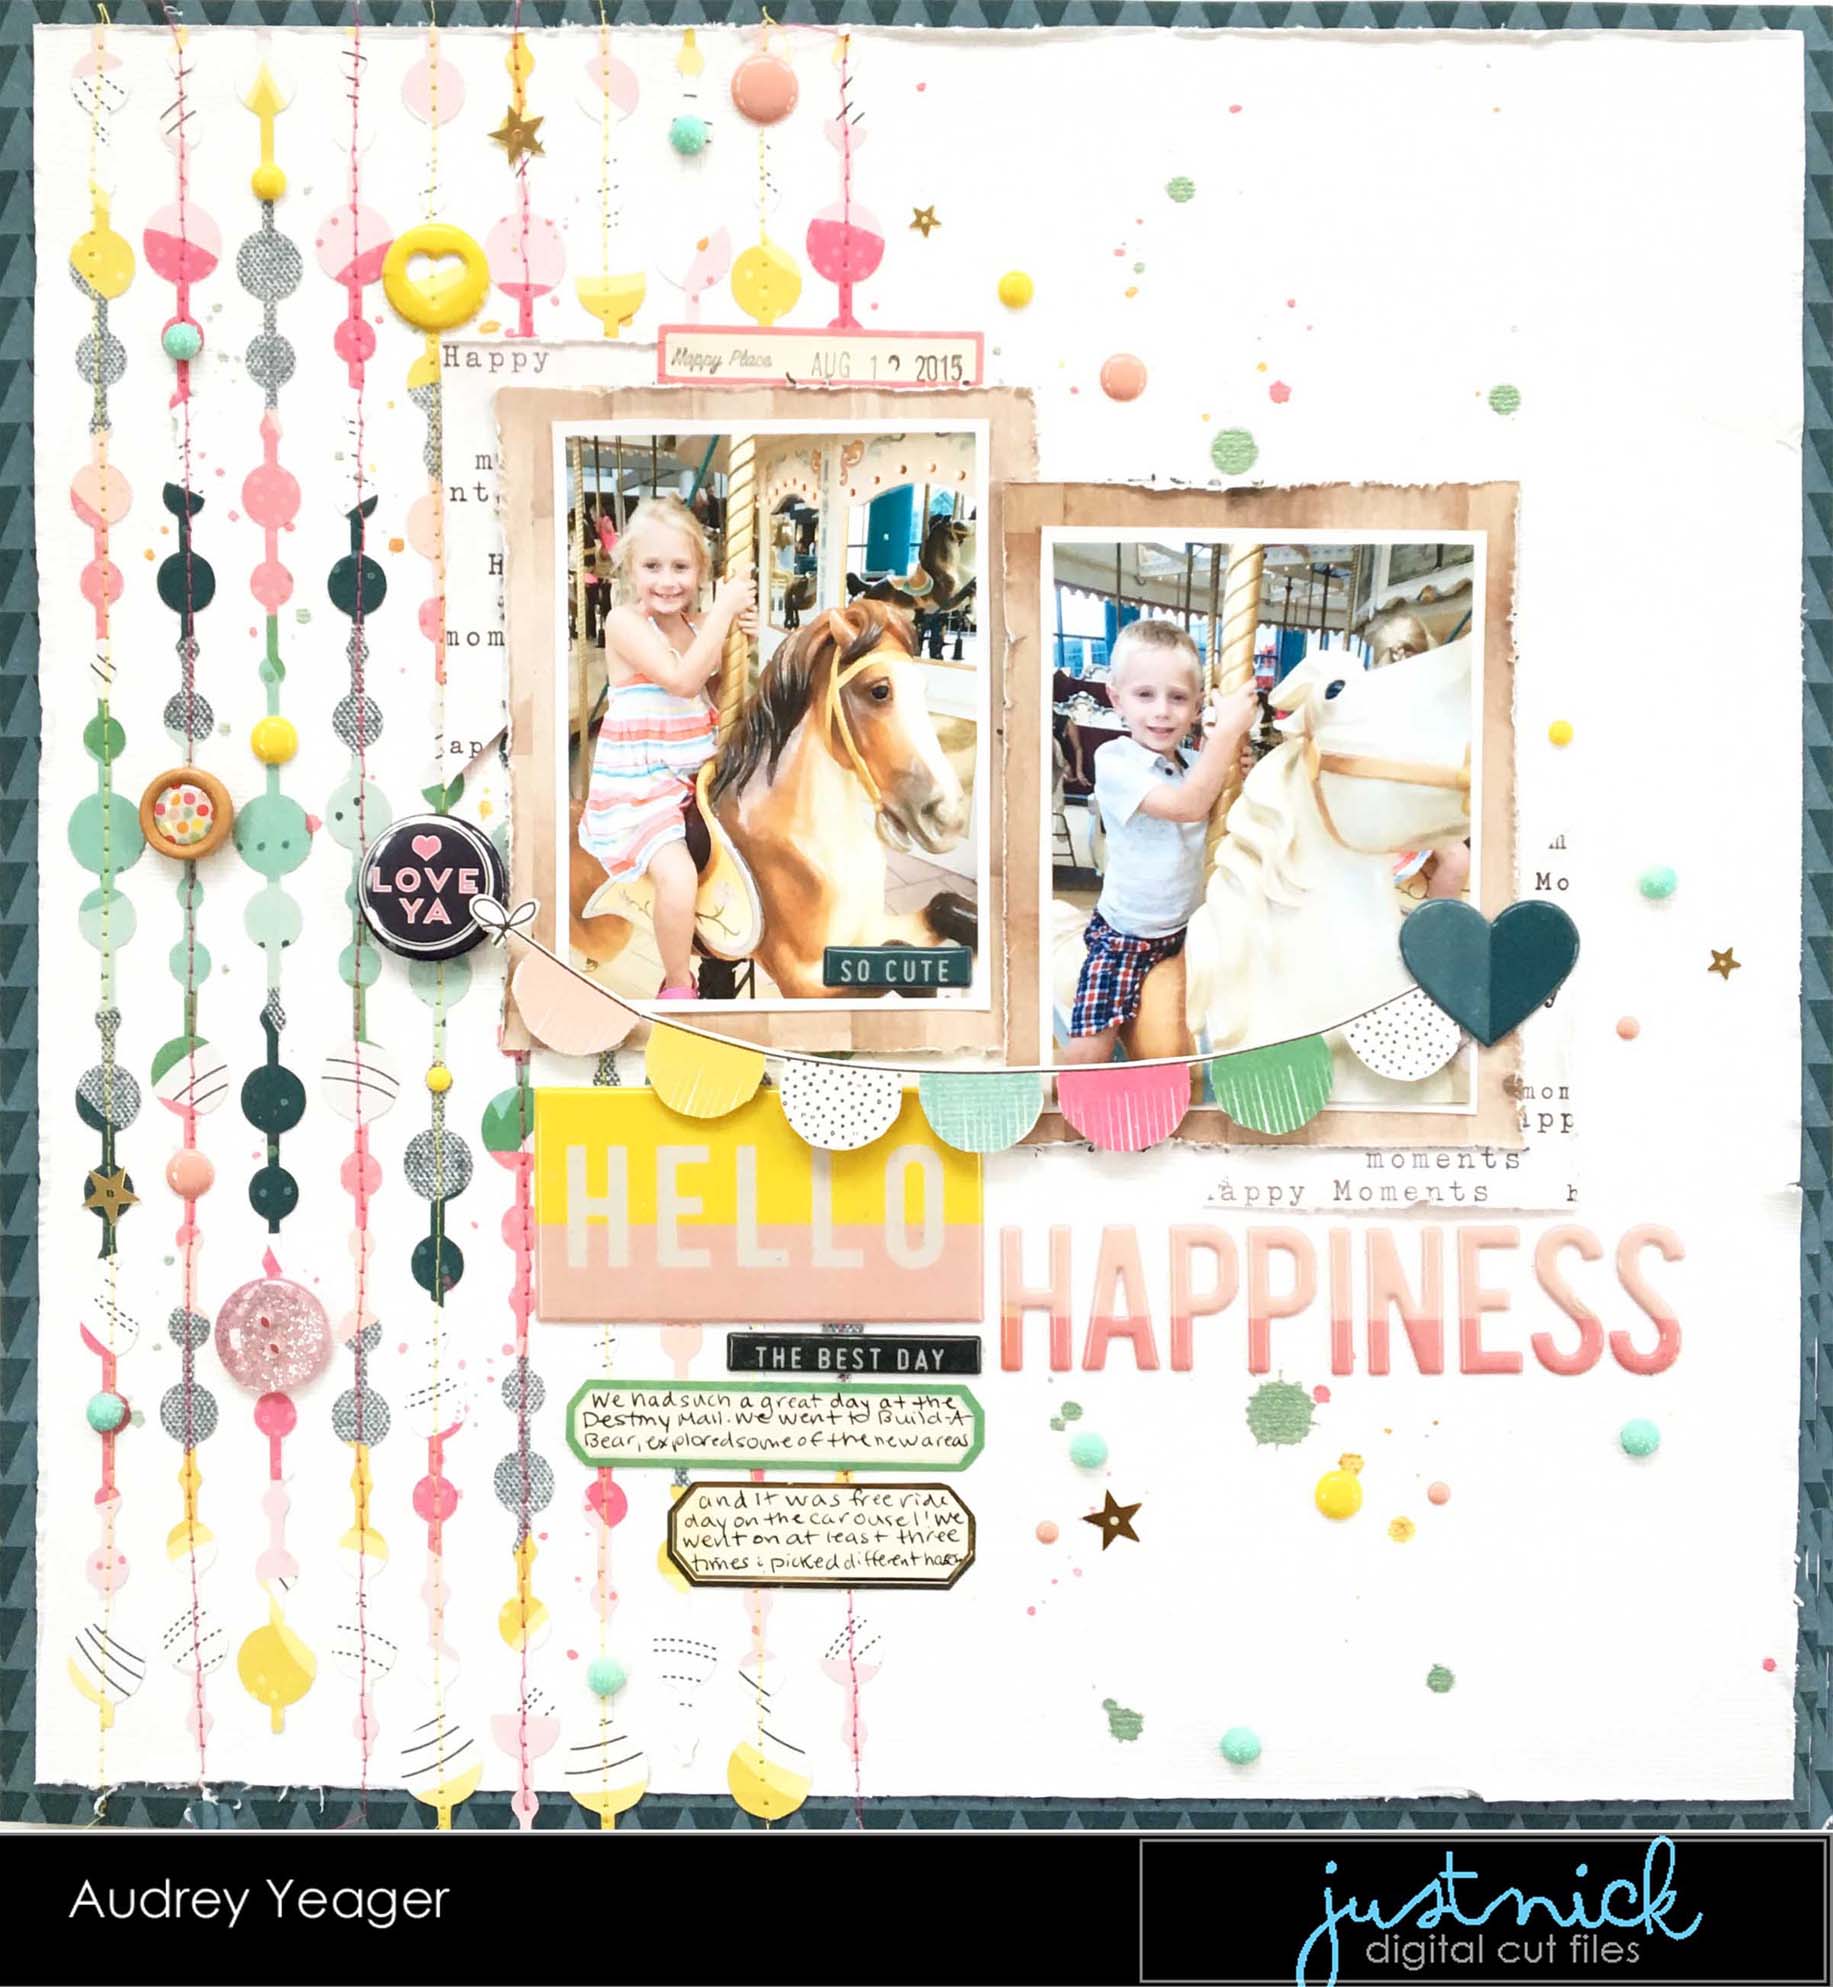
Hello everyone!  I wanted to share this SUPER fun new cut file with you today from the JustNick Studio store!

There are just so many possibilities for the Spacey Circle Background.  Cut it big, or cut it small.

And this file works great both with the negative cut out AND the positive cut out!


I made one cut of this file from a piece of patterned paper from the Crate Paper Maggie Holmes Bloom collection with lots of colors and a busy pattern.  I glued the strips to my page and stitched over them.

I wanted to highlight some of the circles, so I added a ton of circular elements to my page like enamel dots, buttons, and flair.  All of these were from my stash!


I fussy cut out the banner from a piece of patterned paper and popped it off the page. And of course I splattered some mists around here and there, too!


Thanks for stopping by and stay scrappy my friends!

Cut files used:

Spacey Circles 


Wednesday, April 29, 2015

Create your own sunshine! Weekly Scrapper at Scrapbook Expo blog!

Hello there!  I am so excited to share that I was asked to contribute as the Weekly Scrapper to the Scrapbook Expo blog this week!  I had to make a special project exclusive for the blog, and I get to finally share it with you today!  

You can check out the Scrapbook Expo blog HERE for some more details about this project, a few of my other favorite pages, and a little Q & A about me!  

So this was the first real *warmer* day of spring, and my daughter came running off the bus, whipping her coat off yelling, "It's SUMMER!  It's SUMMER!"  It was really about 50 deg. F.!  lol.  But she was full of energy, and after a long winter, the sunshine just does that to you!


Now, honestly, I DON'T dress my kids to match my scrapbook papers, but the navy shirt my daughter was wearing in these photos just went so well with the Saffron Yellow collection from Jillibean Soup!  You can see the collection HERE in the My Scraps & More store.

The first thing I wanted to do was cut out these beautiful flowers from the patterned paper.  So I fussy cut the large flowers and then popped up some smaller flowers in the middle with tiny black brads for centers.


My background is a white on white flower die cut with a floral cut file from the Silhouette store.  Once I glued the die cut down, I machine stitched inside some of the flower shapes to add some texture and interest.


I am so honored to have been asked to contribute to the Scrapbook Expo blog!  You must check it out!  There is a ton of inspiration there!

Stay scrappy my friends!

Monday, June 23, 2014

Almost 5!

If you have followed my blog for a long time, you may remember that every year around Charlotte's Birthday I do an "Almost _" layout, lifting the design of the page every year.  So here is this year's installment of an "Almost _" layout: Almost 5!


I was inspired by a color combo at Color Me Scrappy.  The green of my daughters shirt was perfect for this combo.  I don't usually use such a bold color for background, but I loved this ombre paper from Glitz "Finnley" and the shade of green was a great match!


I was browsing through some cut files in the Silhouette store and loved this one (cut out of white cardstock). I backed some of the open spaces with patterned paper (Crate Paper Styleboard) and gold vellum (MME Necessities).  Then I stitched around the circle with pink thread.


I fussy cut a LOT of flowers from some MME "Now & Then Mildred" paper, and used some other die cut and vellum flowers (Crate Paper MH Styleboard).


A few other stickers and vellum bits here and there on the page.


Just for fun, here are the other 4 layouts from the past years!


Thanks for stopping by!  Stay Scrappy My Friends!


Tuesday, June 10, 2014

Scrapbook Circle Projects-May

Has it really been THAT long since I blogged?  Why look....yes it has!

May was a super crazy month.  I went to a crop May 3rd, and that day I got super sick (a day after my daughter got it). I had a fever for 4 days, and for the next 10 days, someone in my house was sick.  It was tough.

Then it was Charlotte's 5th birthday on the 16th.  And we had TWO parties...one for friends and one for family (more to come on that!).

THEN, I had a super big show as a vendor for My Scraps & More at a small trade show event.  It was a LOT of planning and set up, but VERY awesome exposure for the store....I was even interviewed for a news segment!

So I am going to try and play catch up a bit this month.  And let me start by sharing my layouts with the May kit, "High Five", from Scrapbook Circle.   The May kit is still available in the store HERE.

So here are my pages and a bit about them:

I am so tired of listening to kids CD's in the car, so I have been playing the radio a lot.  The kids LOVE Hey Brother by Avicii because they say "Hey brother" and "hey sister" to each other.


I used a quote from the song as a subtitle and wrote my journaling around the edge.  Behind my photos, I used a sheet of paper from Heidi Swapp (Rainbow Rounds) and cut them to make frames.


I scattered some transparencies, sequins, and brads around the page, along with a few paint splatters.


Next I did this page for a challenge prompt on the SBC page: use hearts in your design.


I started by simply cutting out hearts free hand from different patterned papers and them arranging them on the page. Then I stitched over each one with a horizontal stitch.

 Charlotte's favorite color is orange, so I had to incorporate that a bit behind the photo.  I balanced out the placement of the color with other dies cuts and the title.


This next page is based on a sketch from the My Scraps & More Sketch blog, using a grid design.


On the squares where there were no photos, I layered some paper and embellishments.  There were so many extras in this kit like stickers, transparencies, die cuts, metal clips, stamps, and more!  I use them all!  :)


When I saw the sticker that said "Joy", I knew exactly what my title was going to be!


Here I did some stitching over the chevron stamp, and then added some small brads from my stash for the jouraling sticker.


Lastly, I played around with my Silhouette for this one, and I love how it came out.  Not the best photo of me, but it was the only one I had on my actual birthday, so I decided to use it!


I started by printing the numbers through the Silhouette software and set it so that only the 3 and 8 would cut out while the rest of the numbers were just printed.  Then I backed the 3 and 8 with paper.


 I added only a few simple embellishments for some color and to help draw your eyes across the page because I thought the numbers were a big focus for the page and didn't want to add too much else.


I'll be back with more....hopefully a lot more, for June!

Stay scrappy my friends!
  .

Wednesday, April 23, 2014

What's In Your Basket?

Last Easter, we spent the day at Grandma & Grandpa's and the Easter Bunny hid some eggs and baskets there!  Of course the thing the kids were most interested in in their baskets were the candy filled plastic eggs.  And of course you have to compare to make sure you got the same thing as your sibling.


I used the Dear Lizzy Day Dreamer collection for this page and it is based on a sketch by Melissa Elsner.  You can see on my title letters above that I tried to create an ombre effect by using a stamp pad on the white letters, and stamped darker from right to left.


I used an egg cut file from the Silhouette store to create my eggs from white paper and vellum.  Since the flower paper was so busy, I decided to keep the eggs white.


Finally, to ground the photo more, I stitched a large circle in the background.  And for embellies, I fussy cut out some of the flowers and leaves from that floral print paper...yes, it took a while!


Hope you had a wonderful Easter!!!

Stay scrappy my friends!

Friday, December 27, 2013

Oh Christmas Tree Oh Christmas Tree.....

...how lovely are thy branches.....

We seriously got the fattest Christmas tree EVER!  It took three men to pull it through the baling machine!  This is the first time we've put a tree in front of our bay windows, and it looks so beautiful!


 I really wanted the photo to stand out on this page, so I used minimal patterned paper and a white background.  But I wanted to add some interest to the background, so I created a cut file using SCAL2 and a font called Sego Script.  I welded the letter together and cut it out on my Cricut.


I added a few splatters of paint under the large title on the white cardstock to make it stand out just a bit more. I didn't do any journaling on this page because the title pretty much says it all!  :)


The design of this page is based on a sketch at Stuck?! sketches, which you can see HERE, and a color combo challenge at My Scraps & More.  I used die cuts from Simple Stories, papers from Webster's and Basic Grey, and gold stars from Studio Calico.


I also used a few vellum pieces and tags from Pink Paislee, and a wood veneer circle that i misted green to balance the page a bit.


Stay scrappy my friends!


Friday, October 11, 2013

September Scrapbook Circle Projects (yeah..i know....its October)!

Can I tell you how happy I am to be a part of the Scrapbook Circle Team again????  I love love working with the kits!

Somehow, my post with my September projects never got posted, so here they are!

Here is my page of Kyler using the vacuum.  He LOVES the vacuum...whenever there is one out, he has to be using it!  I hope this continues through his teenage years!  :)   When we leave grandma's house, he even says goodbye to her vacuum!

Many times when I am working on a page, I try and use something from the photos to inspire my design and the products I use.


I thought of what a messy floor looks like when right before you vacuum it up (specifically, the area around my scrap space! HA!). Strings, and scraps and maybe a few drops of paint or mist splattered here or there. So those are exactly the things I used on my page!


I used a grungy stamp and some charcoal ink around the edges of my page in some spots, then just took some clusters of strings and layered them under my scraps of paper. I machine stitched over some of the strings to help keep them in place.


This was based on the Sept. sketch on the SBC blog.


This kit comes with an entire box of Fancy Pants cork arrows, which just add so much depth to a page. You can paint them or mist them to match your pages, too!  Here I wanted to do something creative with them.  Kyler turned 2 in July, and I wanted to use a big #2 on my page as a focal point.  I thought the cork stranding out against the black and white stripes made for good contrast!


I started by cutting a large #2 on my Cricut and then covered it with the small cork arrows.  Then I simply trimmed the edges of the arrows off by turning the number around so I could see from the back where the pieces were off.  I then inked the edges in black to make it stand out a bit more.


I matted behind the frame a bit by adding some strips of the grey washi tape in the kit. The rest of the page I kept pretty simple by added a banner with some brightly colored pieces.    This was about the 3rd or 4th birthday page I did of him, so I decided not to add any journaling this time.


Sometimes I find Polaroid frames challenging because my photos dont seem to fit right, so I used them to create an overlapping grid pattern on this page.  Charlotte actually took the photos of Kyler and I...he took my glasses and put them on and then gave me his.  And of course, Charlotte then wanted to switch, too...


I added a bit of depth with some tone on tone cork elements on the cork paper.  Lots of fun bits and pieces on this page!


And lastly, this fun fun page that was actually inspired by a TISSUE box that I bought for Charlotte's room!  You can read more about it HERE on the SBC blog.


I designed and cut the pattern with SCAL2 on my Cricut and then added patterned papers behind the cut outs.  Some of the cut outs I purposely left empty and instead popped some white cardstock from the back to give it depth.


Just a few other elements like buttons and twine.

And faux stitching to highlight some areas of the page.


Did you know that you can save TWENTY percent off your order at Scrapbook Circle (subscriptions not eligible)?????   Just enter the code Audrey20off at the checkout!  Happy Shopping!

Stay scrappy my friend!